Following on from my previous post on HCX+, I’ll now cover the next stage in the process. Apologies for the delay, I’ve been enjoying some time off work!
As a very quick recap, so far both our on-prem and SDDC HSM appliances have been deployed and activated.
If we use the UI to try and pair sites, it will tell use that the on-prem site must be configured first. This is effectively configuring the Compute and Network profiles as we do with regular HCX.
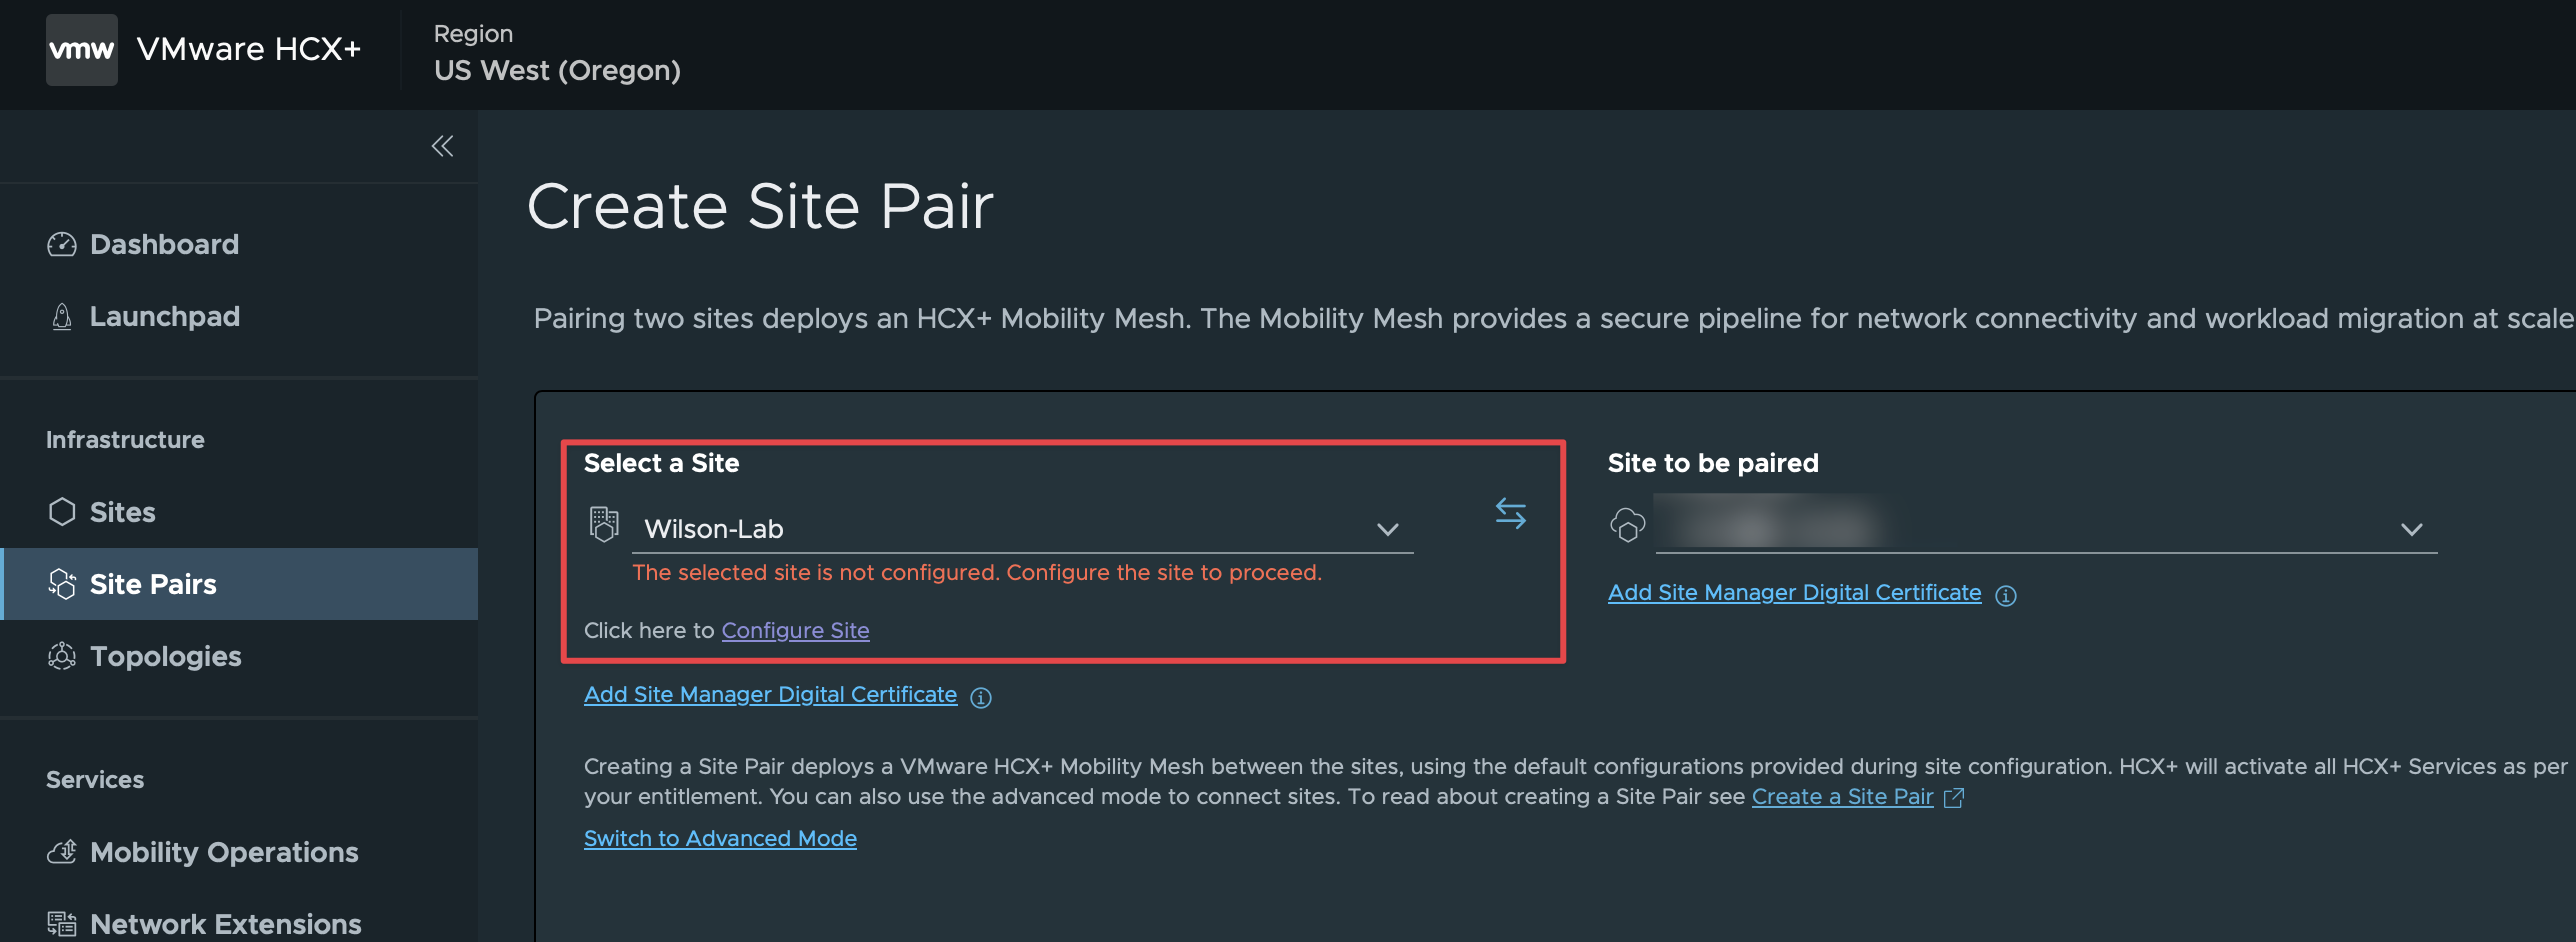
Clicking on configure site will take you to the following screen.

Clicking on Continue Configuration takes you to a screen where you start configuring the profiles.
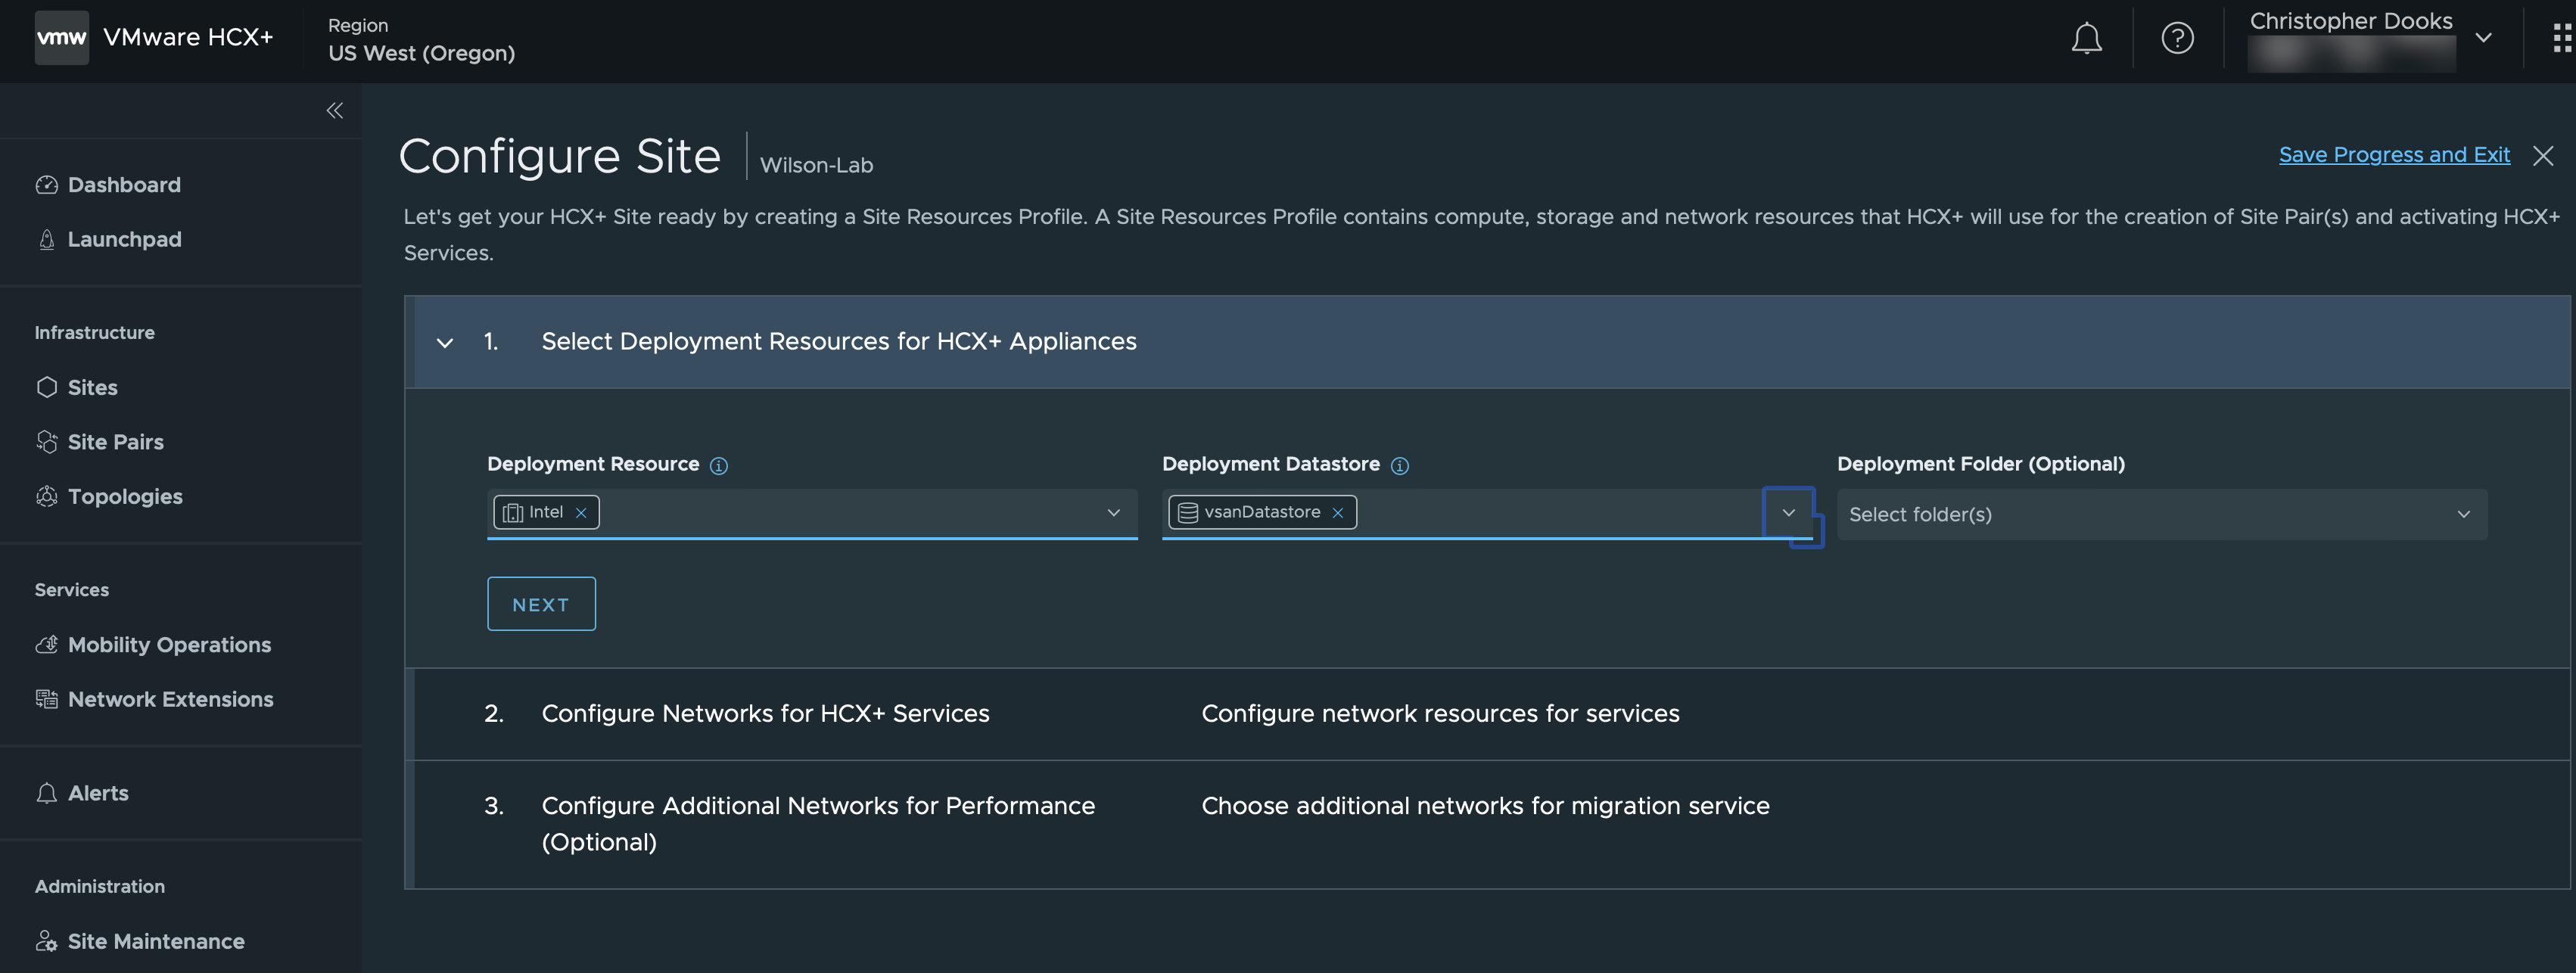
I’ve selected my ‘Intel’ deployment cluster and its vSAN datastore.
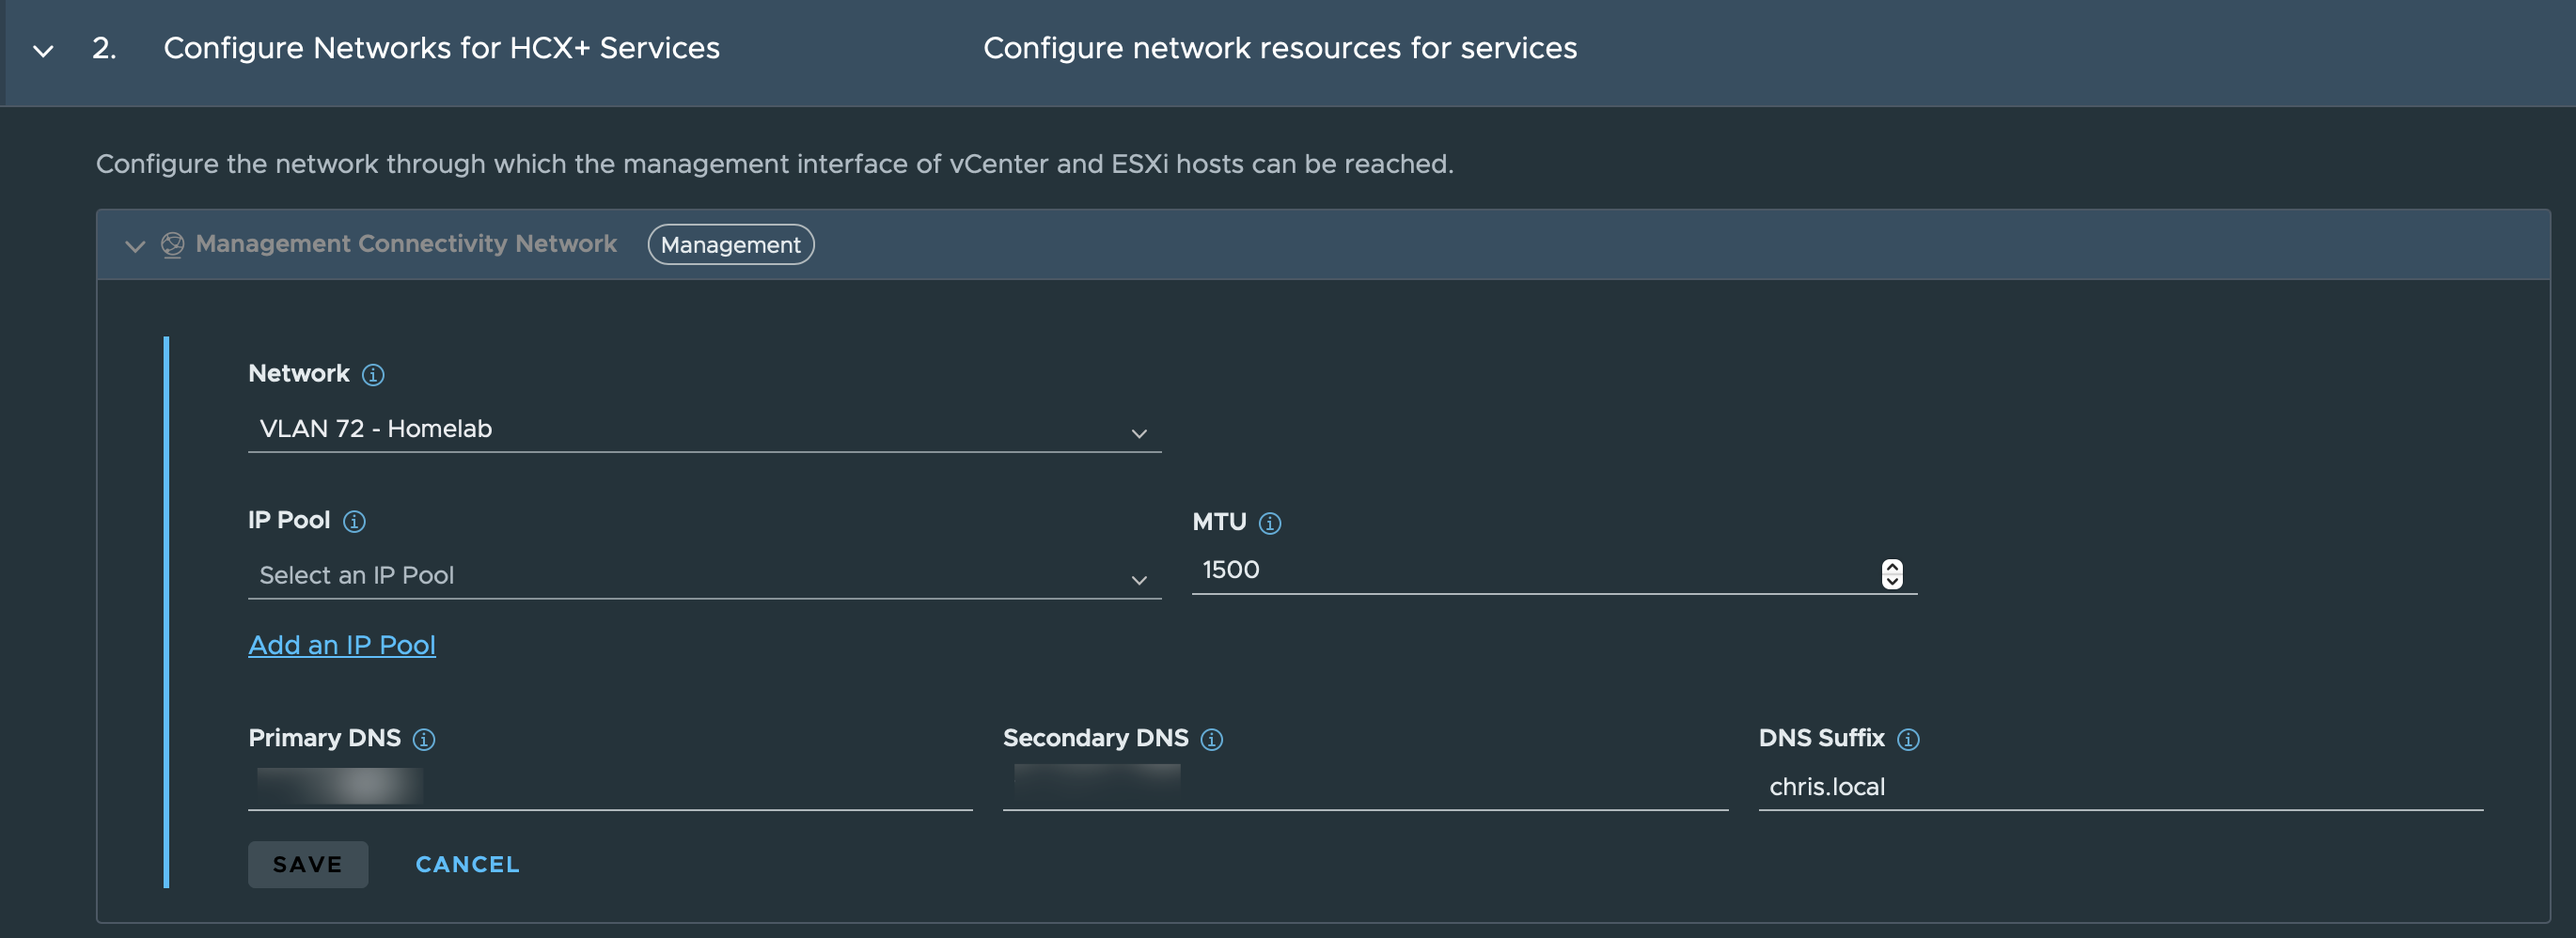
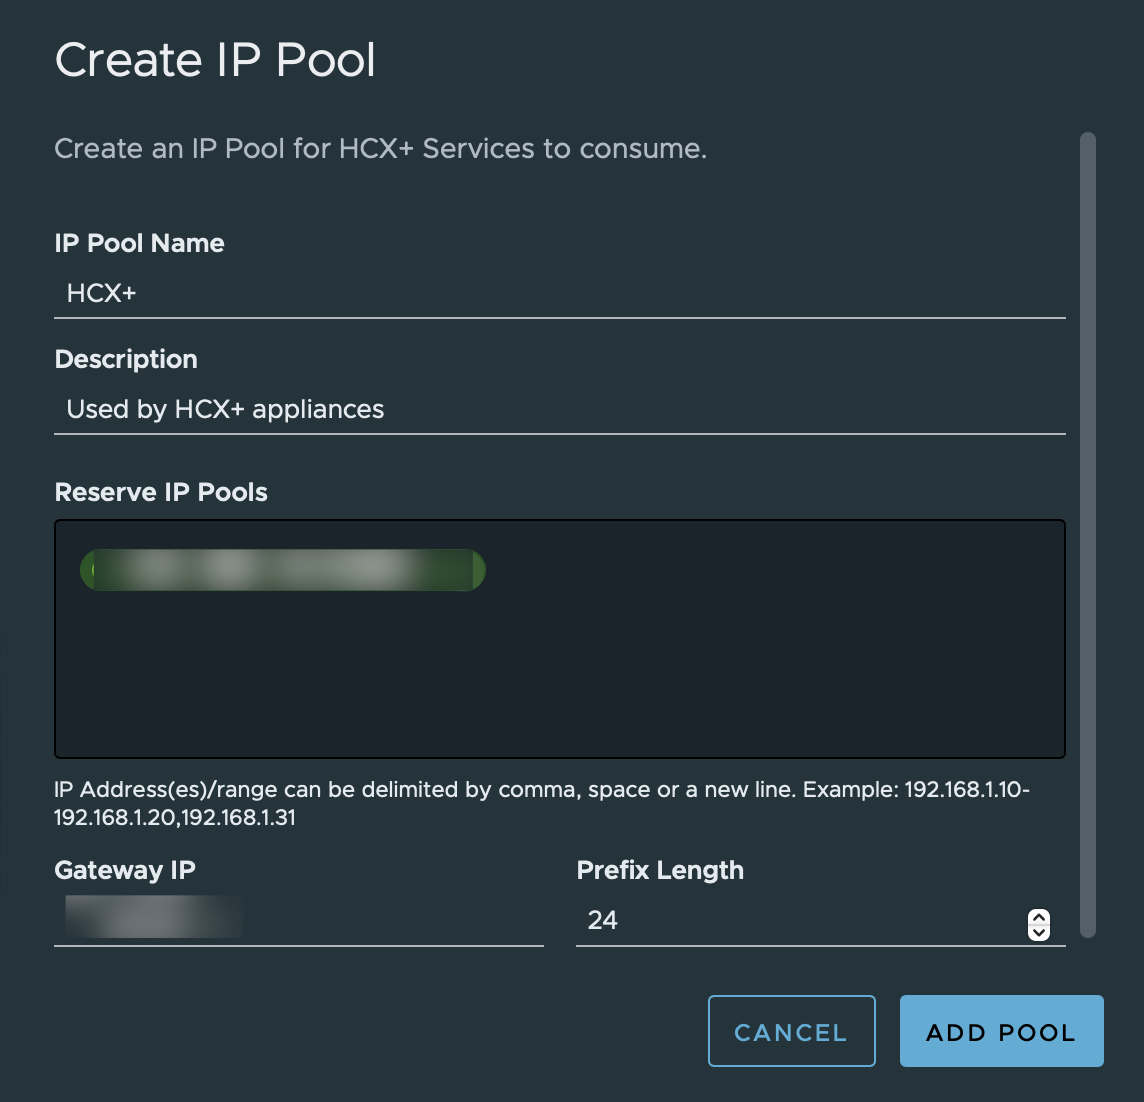
Then configure the network settings, if you haven’t already created an IP pool you can do so now. You would need an IP Pool for Management, and then optionally for external access, vMotion and vSphere Replication. As this is a lab, I’m going to configure a single pool and also single network for all services. In a production environment, it is highly recommended to split these services out onto different networks.
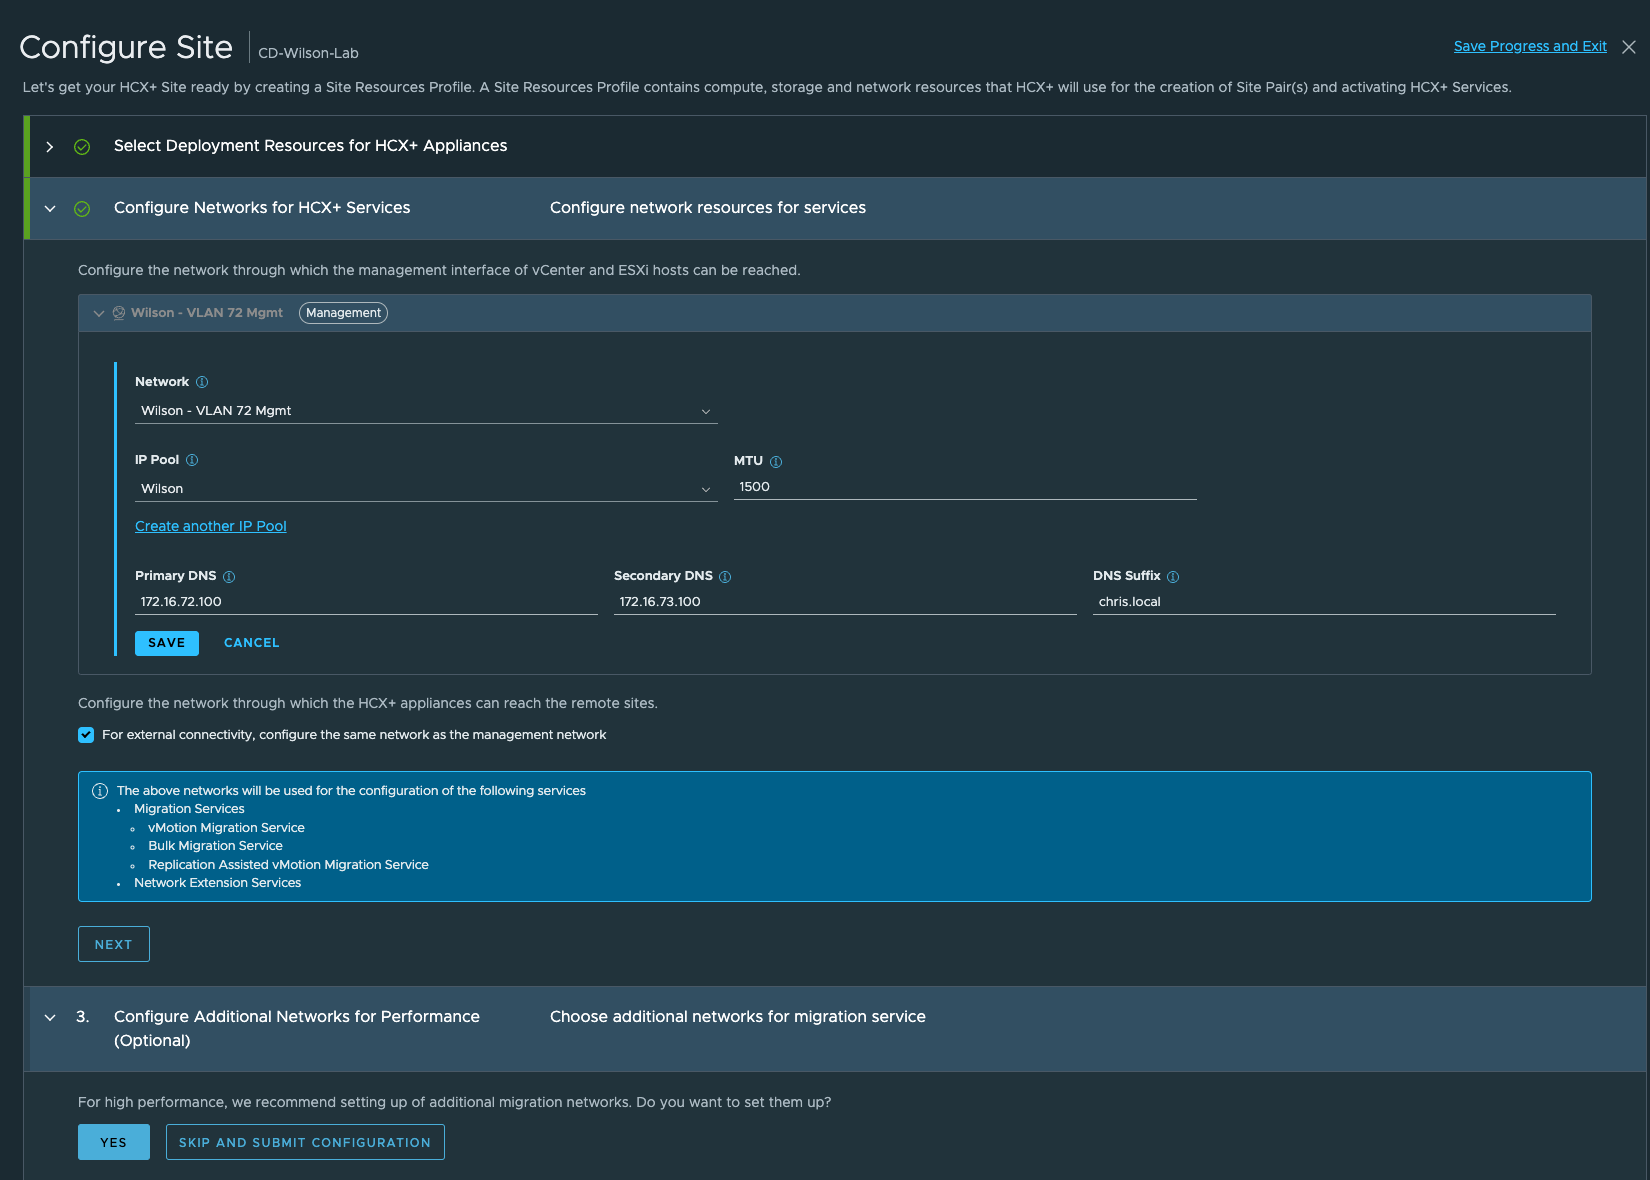
The values within the IP Pool depend on your environment.
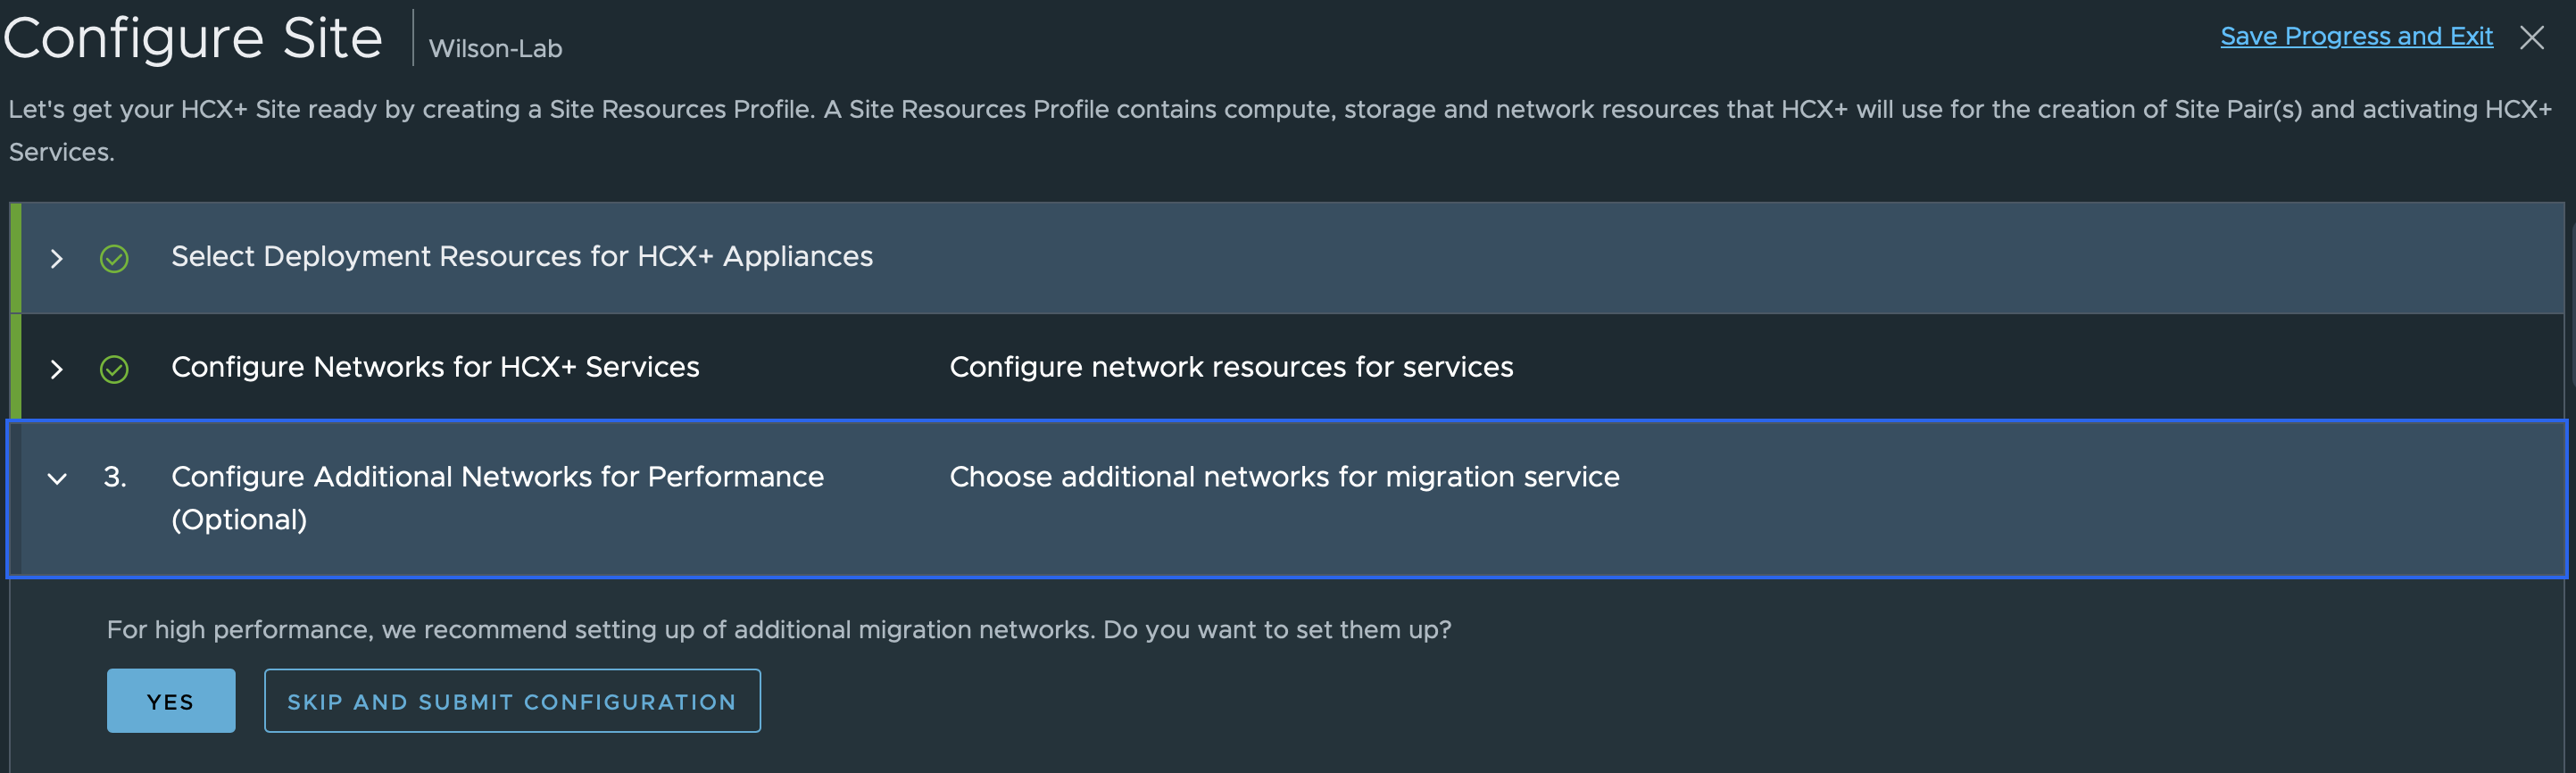
Once done, press next and it will ask you to configure another Network Profile for performance. Best practice would be to have vMotion and Host Based Replication (vSphere Replication) on a different network than management, however in my lab I have it all on the same vmk. In production environments, configure it as appropriate.
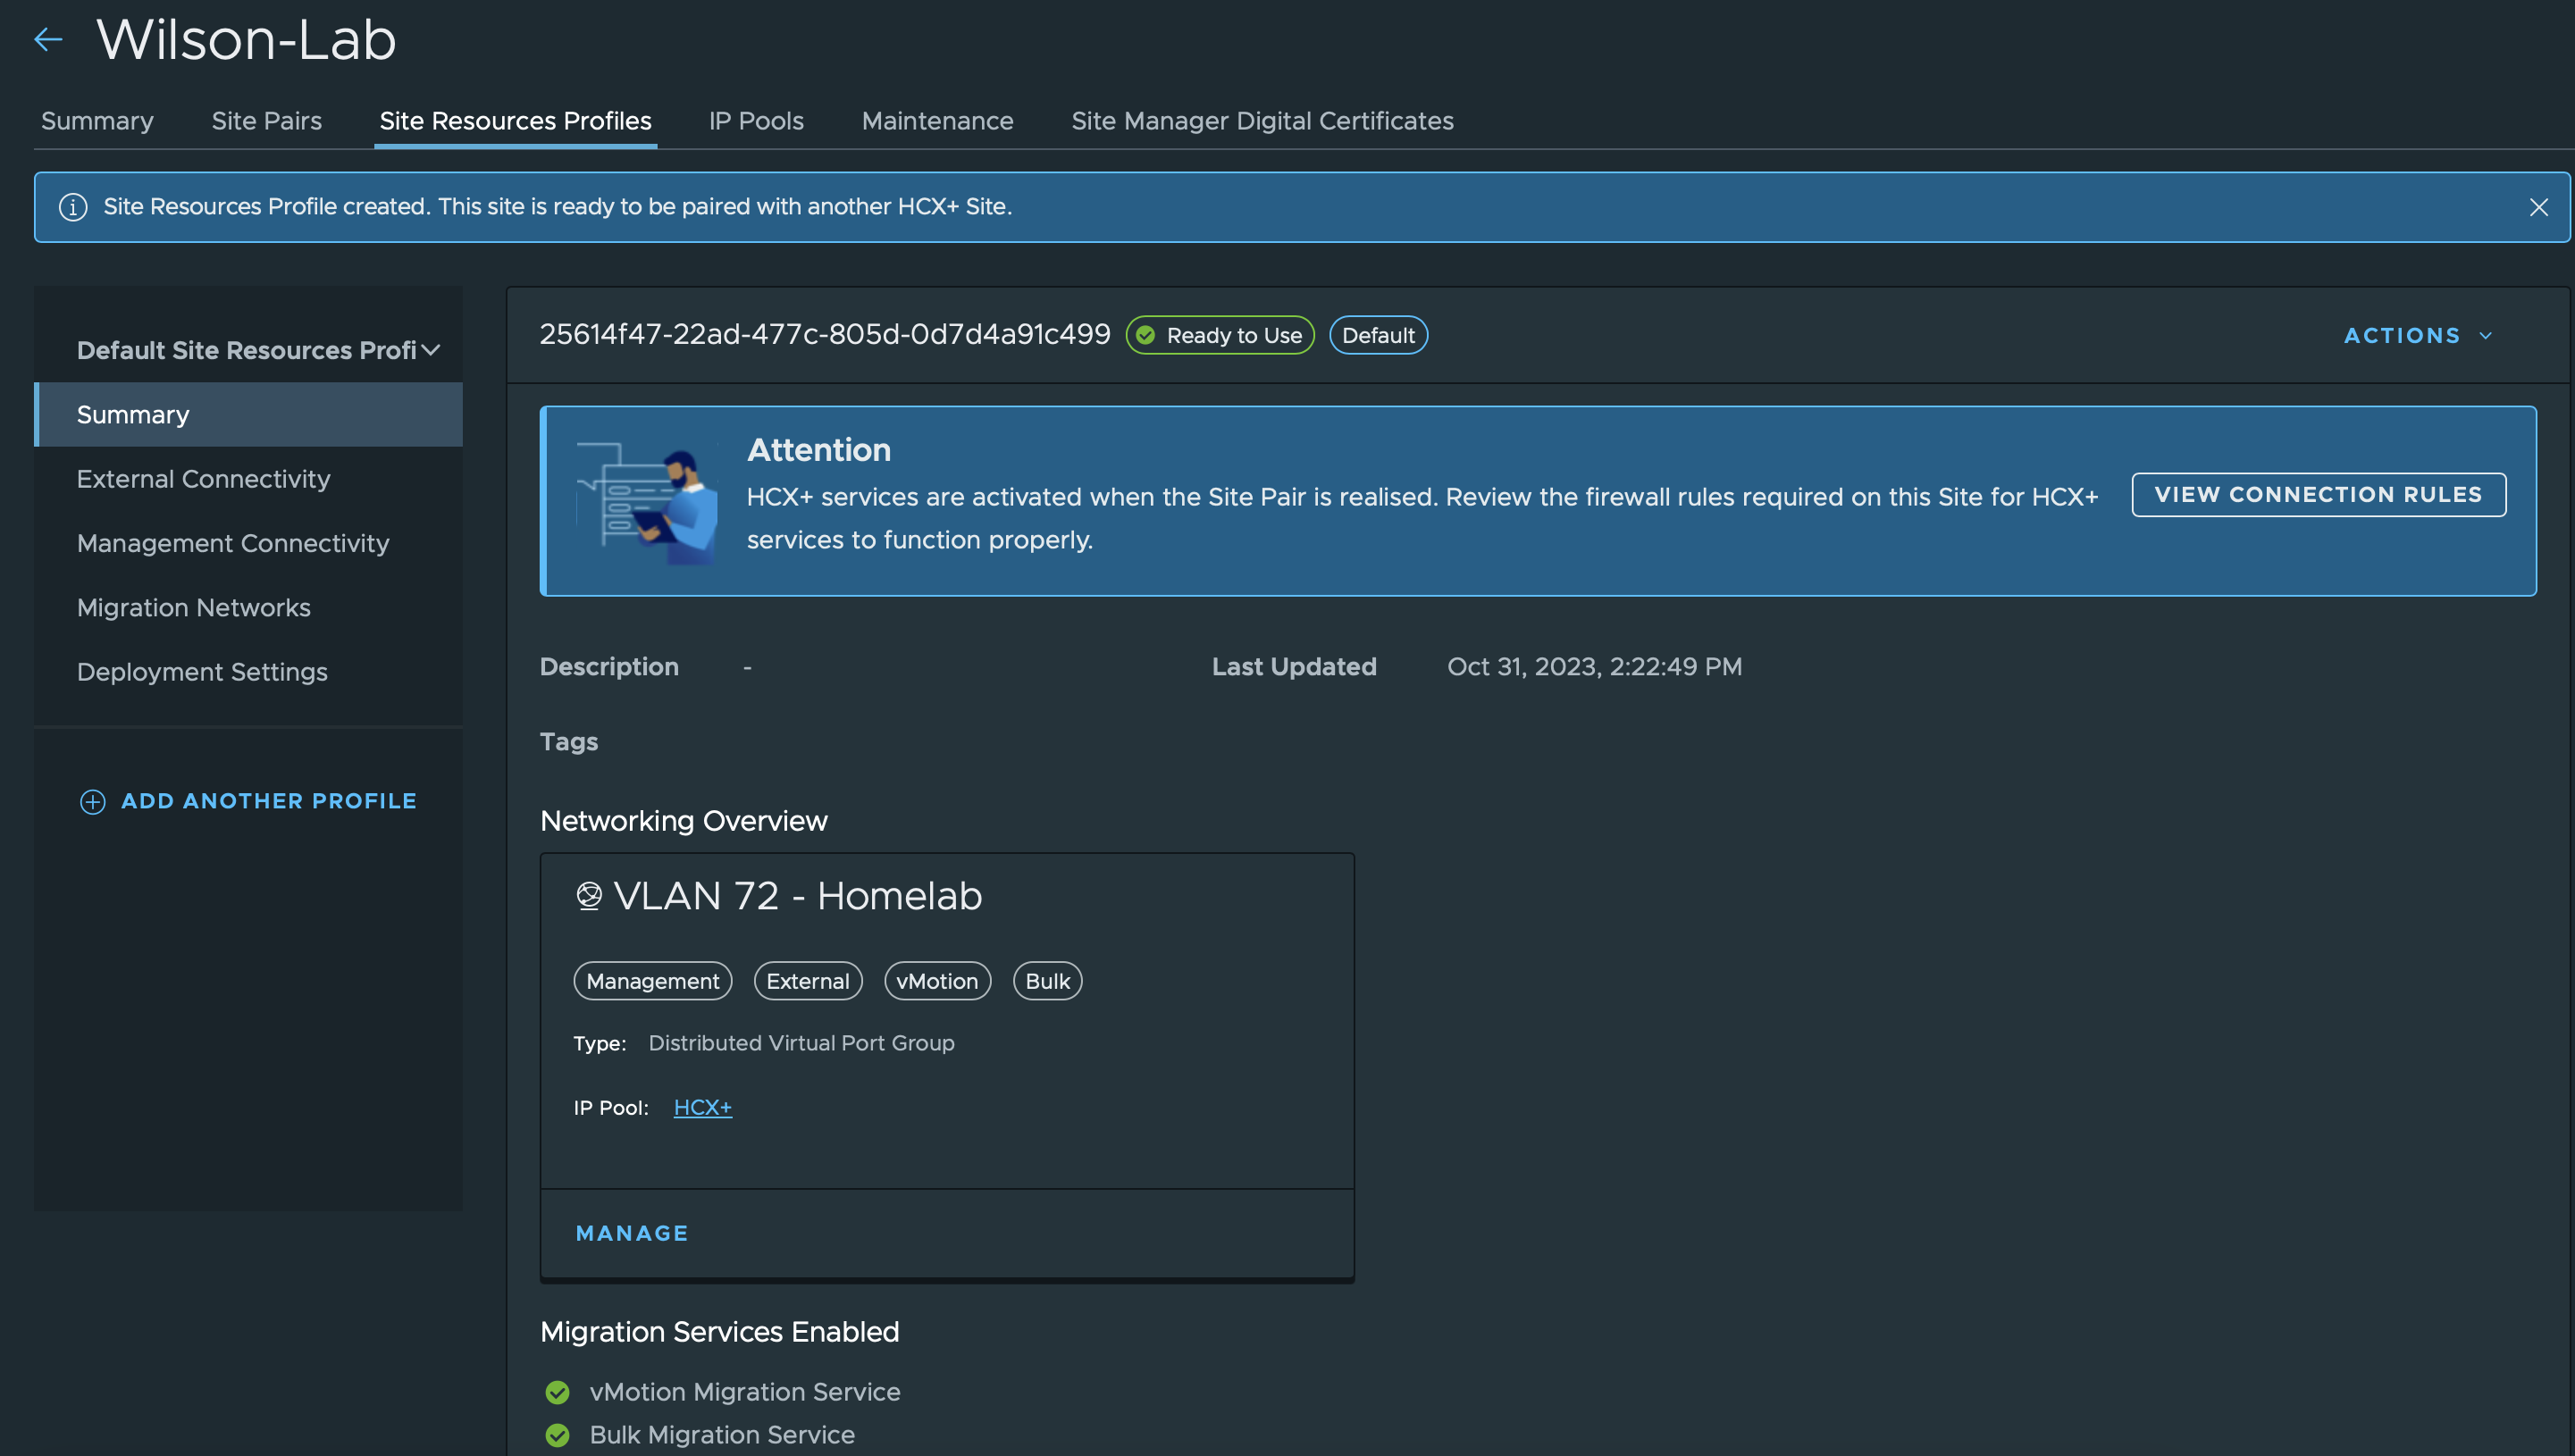
After this you can review the site configuration. In these short few steps, all the required Compute and Network profiles have been created for my lab. This is really neat for HCX+ as it simplifies the process.
With the site configured, you can now create the site pair between on-prem and your HCX+ Cloud Manager.
Unlike HCX, you must import the certificates from each manager in HCX+.
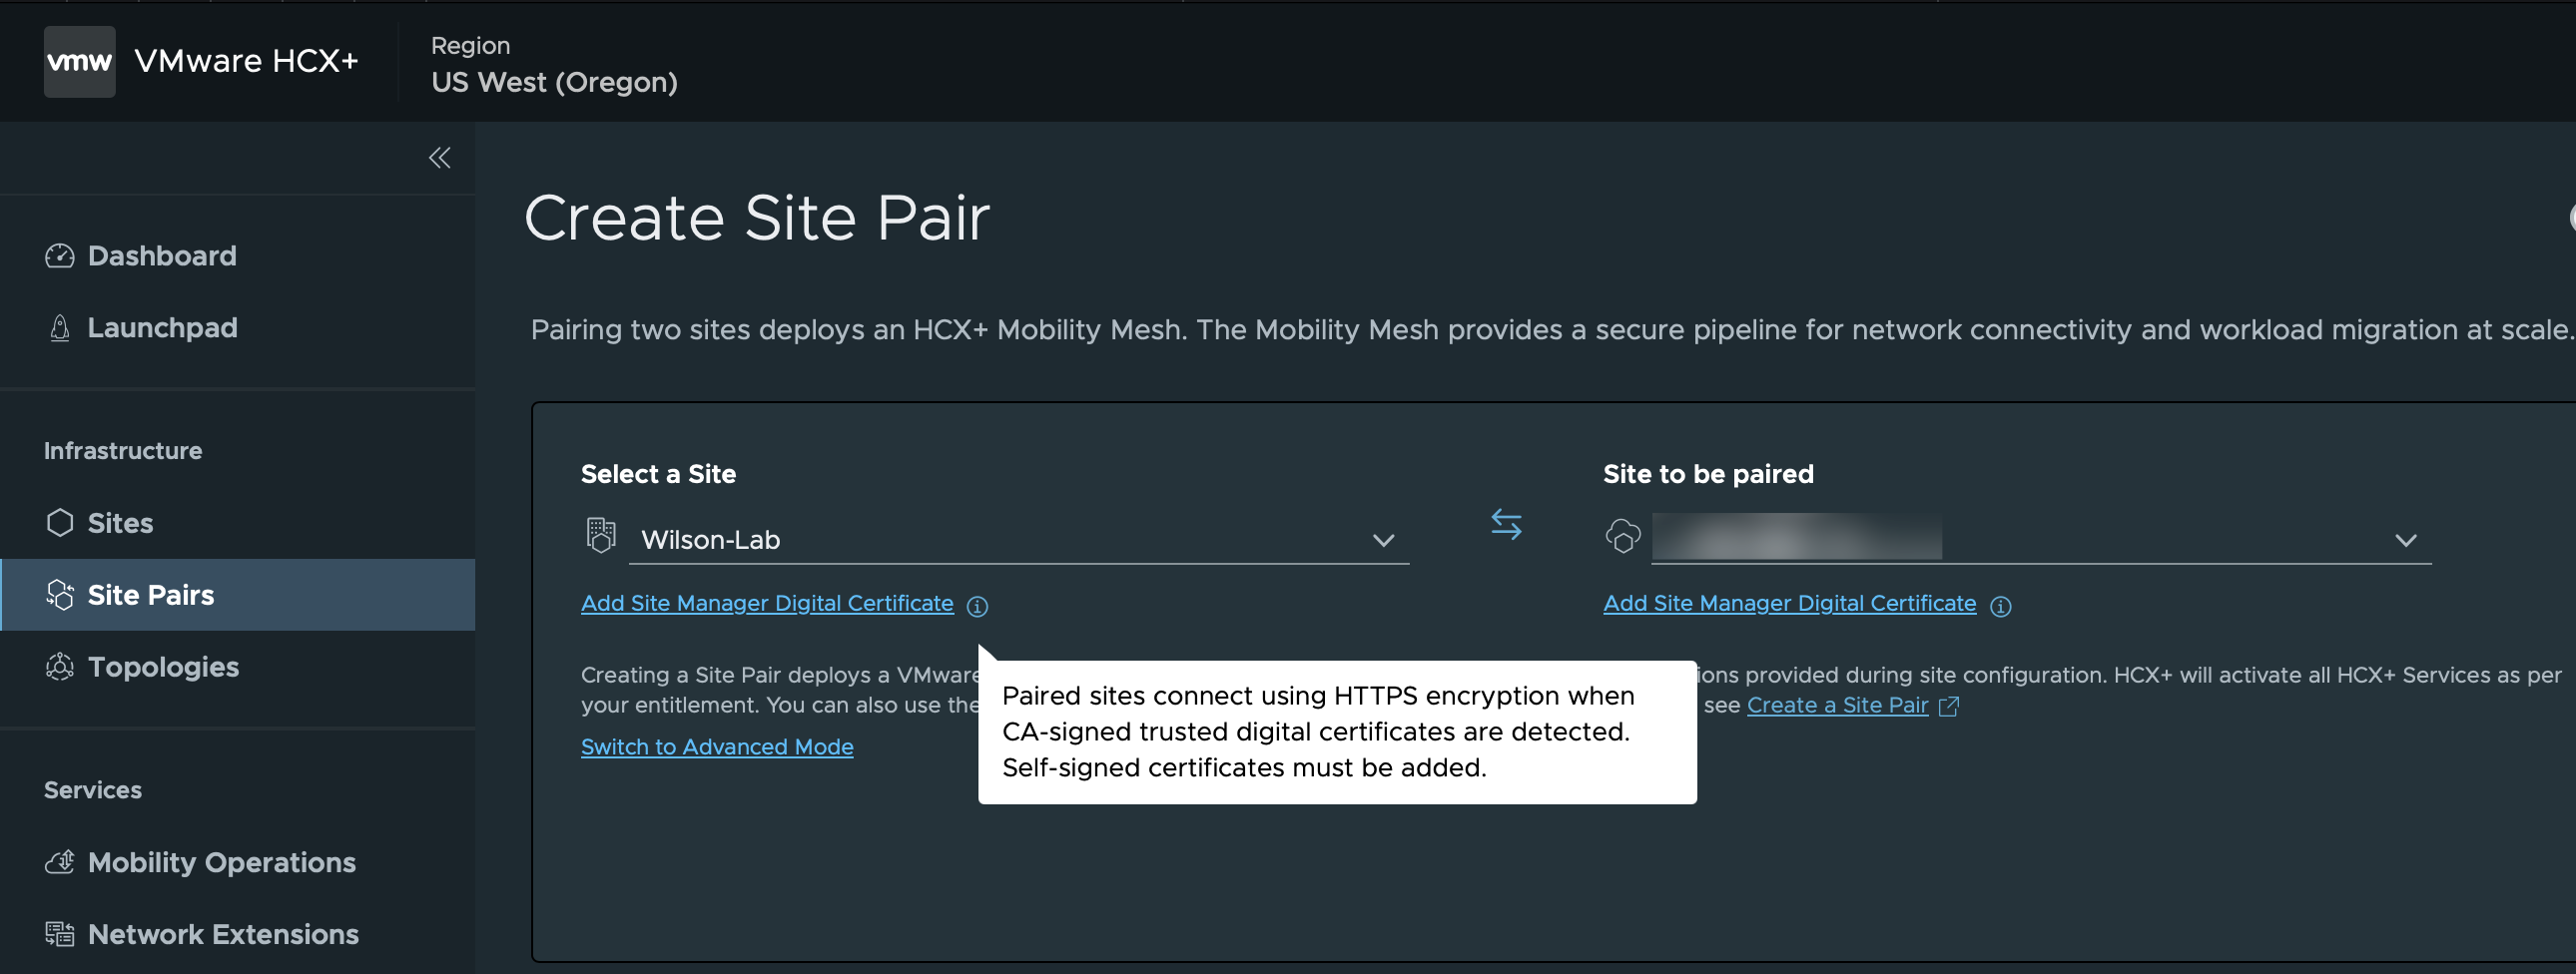
Use a browser to export the PEM or Base64 digital certificate, and then upload the certificate to HCX+. Using your favourite browser, enter the URL for each HSM and then export the certificate, and then upload them under the site pairing screen. Once the certificates have been uploaded, choose which HCX services you want enabled, and if applicable, configure Network Extension. Unlike regular HCX, with HCX+, when you configure a Site Pair you can also deploy your Service Mesh(es) which again is a really nice feature.
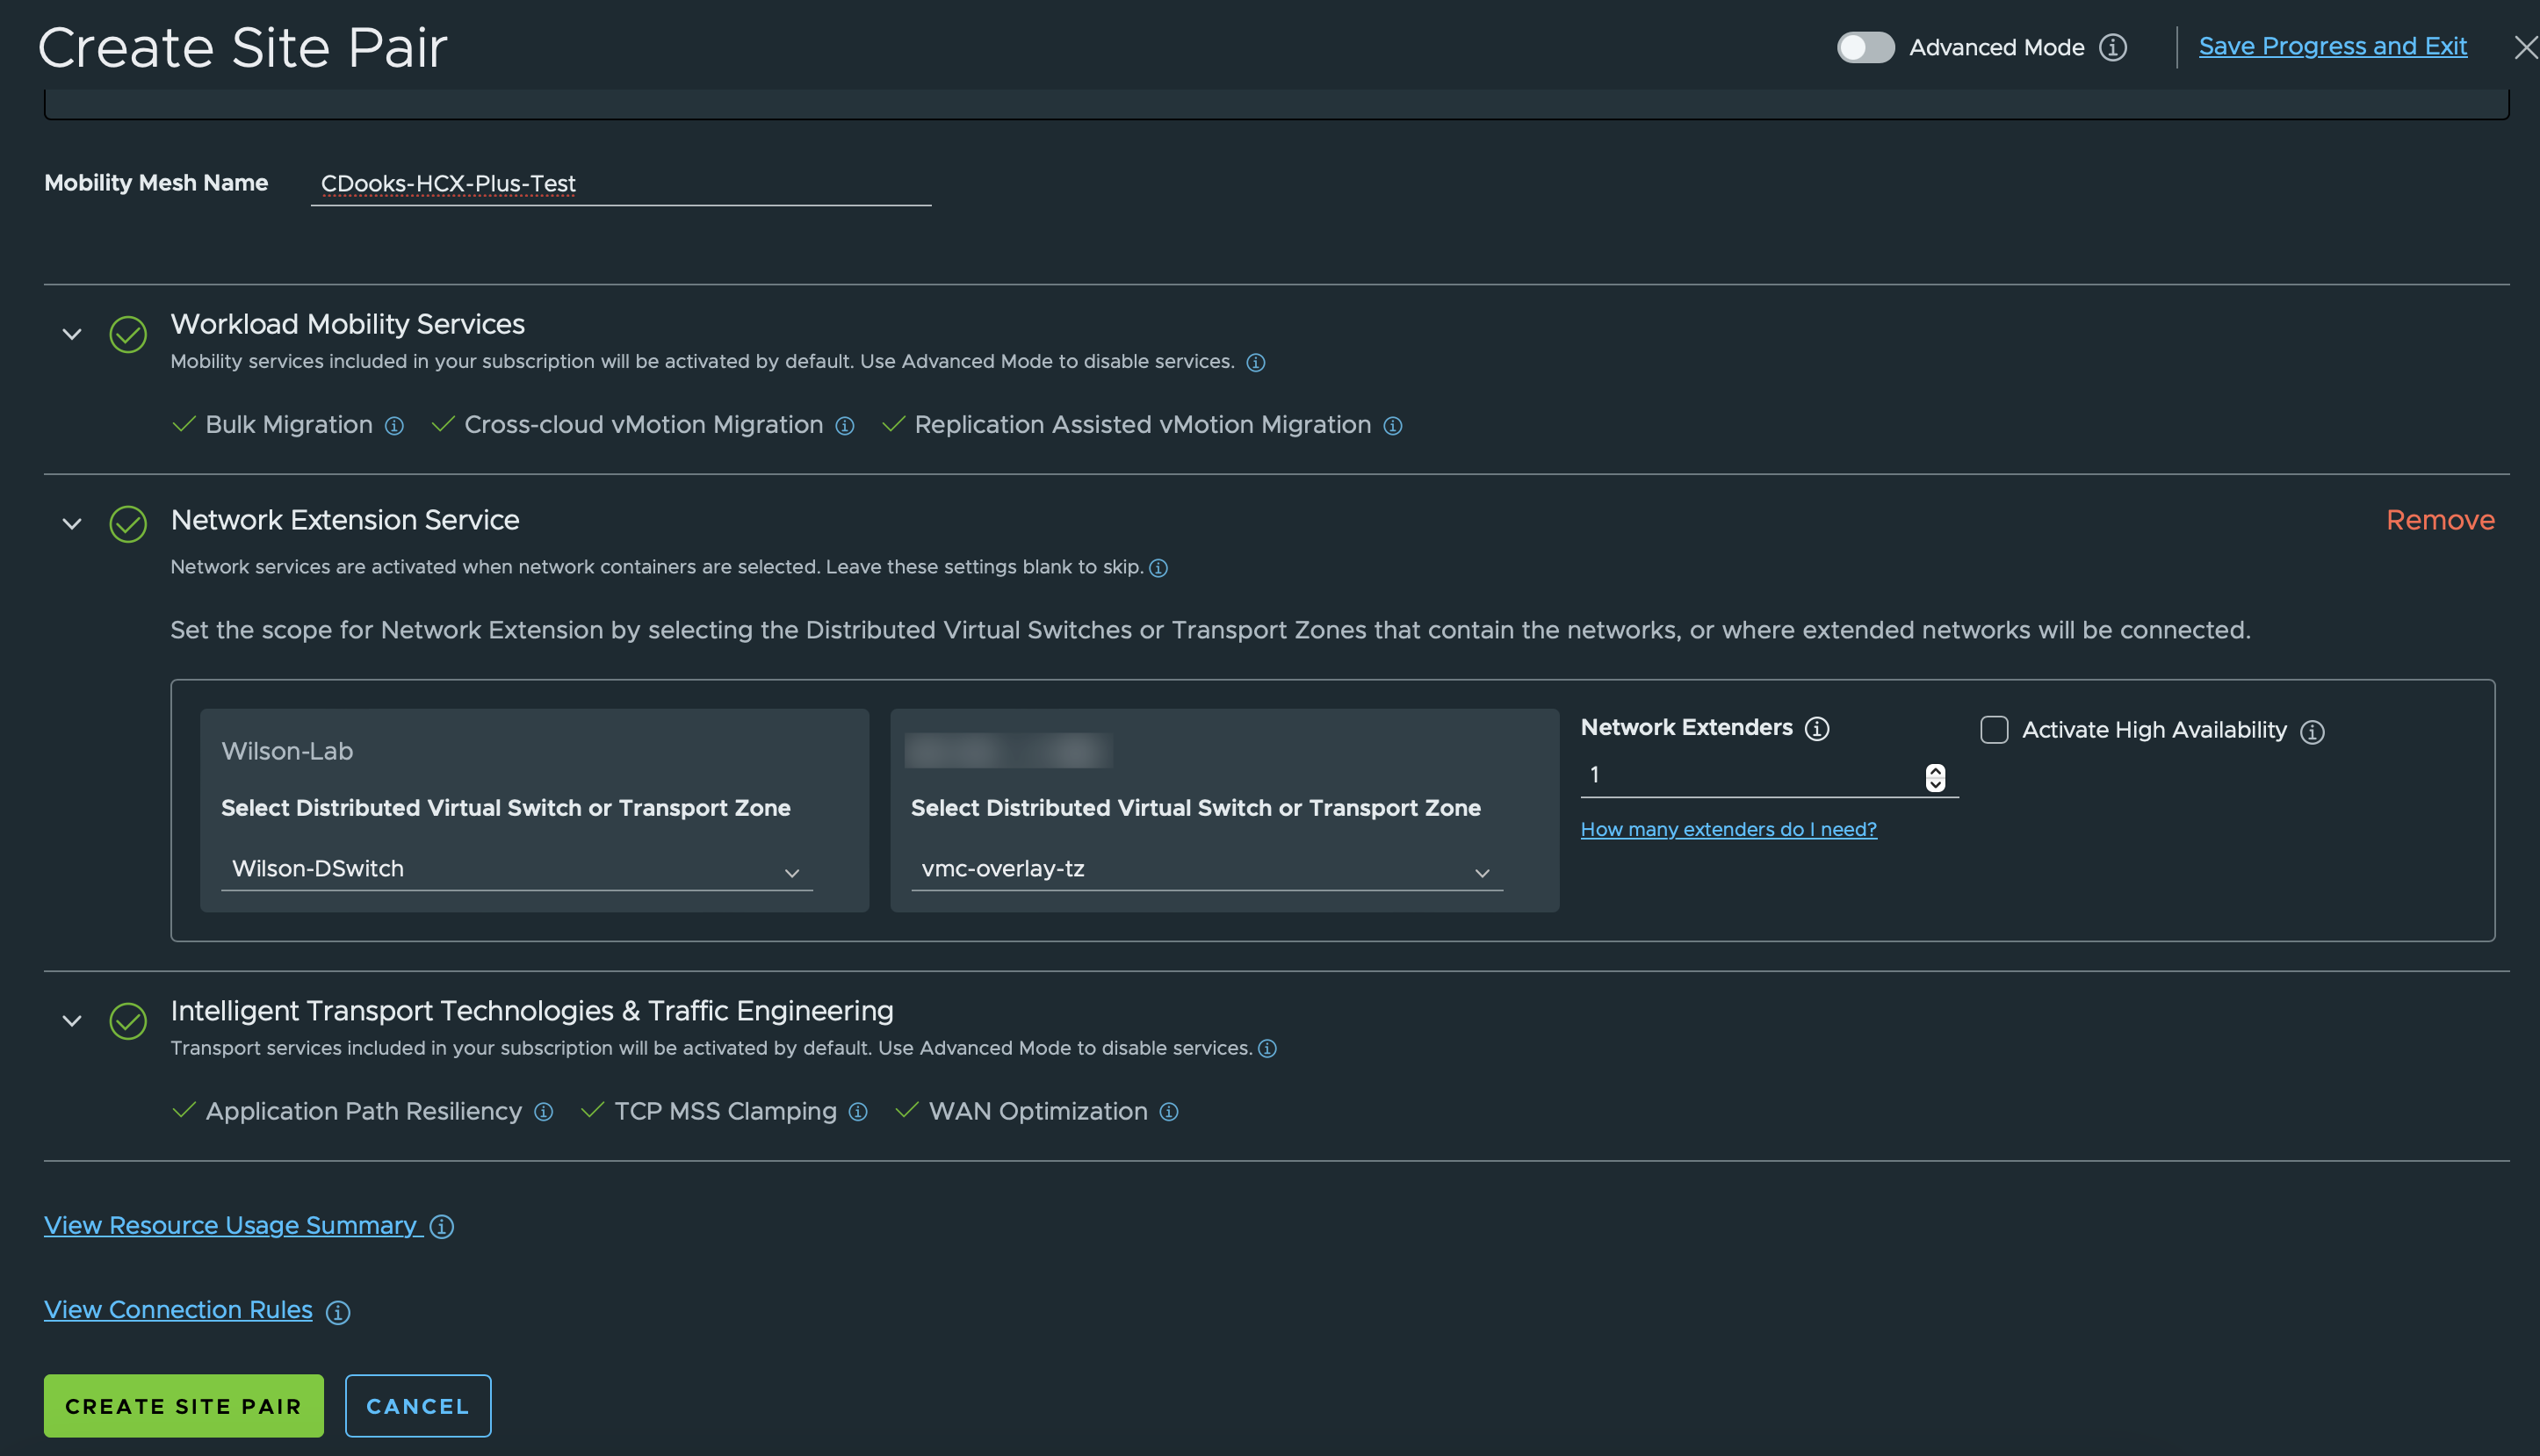
For larger deployments, you can view appliance usage summary and also connection rules which may be applicable for your firewall configuration. When you press Create Site Pair, the Site Pairing and Service Mesh deployment will start.
As long as there are no issues with the provided configuration, everything should deploy and the Service Mesh(es) configured should come up. If there are issues, the UI will highlight the problem area for you to review.
I would like to point out that this is the simplified deployment process, and it will check all options including WAN-OPT which may not be suitable. HCX+ also offers an advanced configuration method where you can choose the services you want which will feel more familiar to seasoned HCX administrators.
One final note, when you on-board an SDDC the configuration will default to the internetUplink configuration, if you want to use a DX or vTGW, then you need to change this to use the directConnect network which I covered for normal HCX here.
The next post will walk through extending a network as well as migrating VMs.