I’ve seen a few cases in the field where a HCX Manager has been deployed onto the same network which is use by workload VMs, and to make matters worse, the network is in scope for being stretched and then moved to the target environment. The issue here is that when you come to unstretch a network post VM migration activity, the same network the HCX manager is using to talk to the hosts, vCenter etc, and far side manager, you effectively gate yourself from ever being able to remove the stretch without causing a lot of headaches.
There are clear reasons why this may appear to be unavoidable especially in older environments, such as legacy networks with large IP ranges that are used for everything (not something I recommended!). I always try to get a new network for HCX components wherever possible to avoid this from happening.
If you ever find yourself in this situation, fortunately although not documented and likely not supported, it’s relatively easy to un-gate yourself.
Disclaimer: changing the HCX Manager IP address is not supported as far as I am aware. Continue at your own risk. If the necessary routing/firewall rules are not in place, you risk further damage. Always raise a support call for assistance in these situations.
Before proceeding, I should also point out that the new network/IP must have all of the ports open as laid out in https://ports.esp.vmware.com/home/VMware-HCX
While it is documented to change the Manager IP address in the VAMI, changing the gateway does not work which means you can’t move it onto another networking using this method.
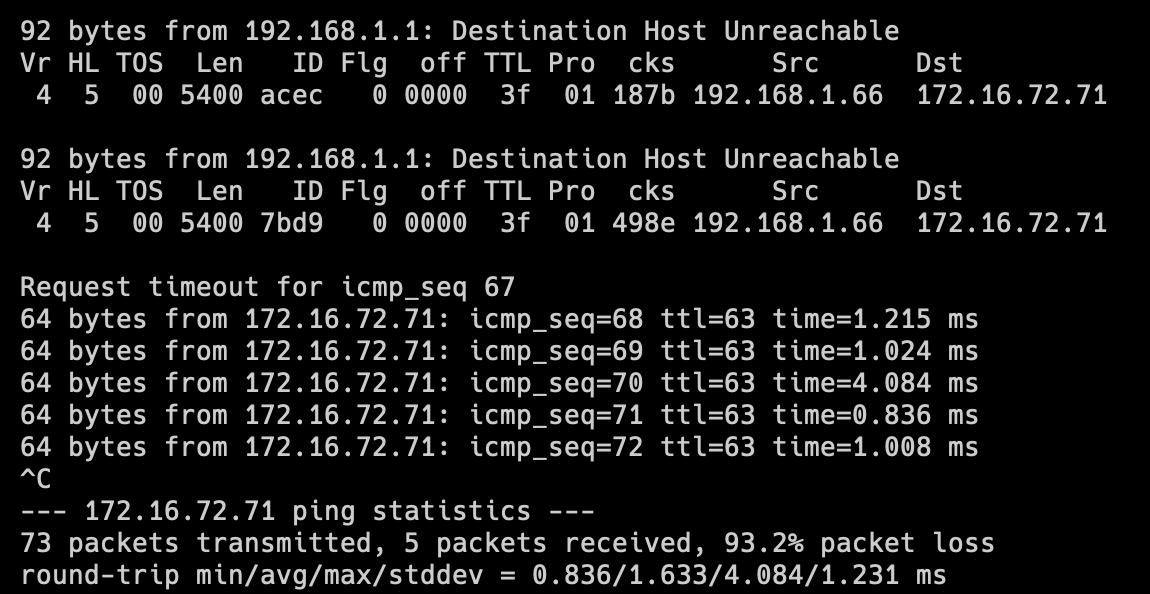
I did see some connectivity issues to my test VM on the far side of the stretch for a short period. I cannot explain this, it might just be my lab, or it could be as a result of changing the manager IP address. Therefore tread with even more caution. I will test this some more and update. Update 6th November 23: After more testing, I’m fairly certain that the packet drop I saw is a local lab issue and has nothing to do with HCX.
To lab this out, I have deployed a HCX 4.6.1 lab and I have stretched a network into the Cloud Side NSX-T overlay, the very same network that the HCX Source Connector is using. Why 4.6.1 you ask? Well, it’s one of the ISO’s I had laying around. The version largely does not matter apart from a filename (more on this below), the workflow is the same.
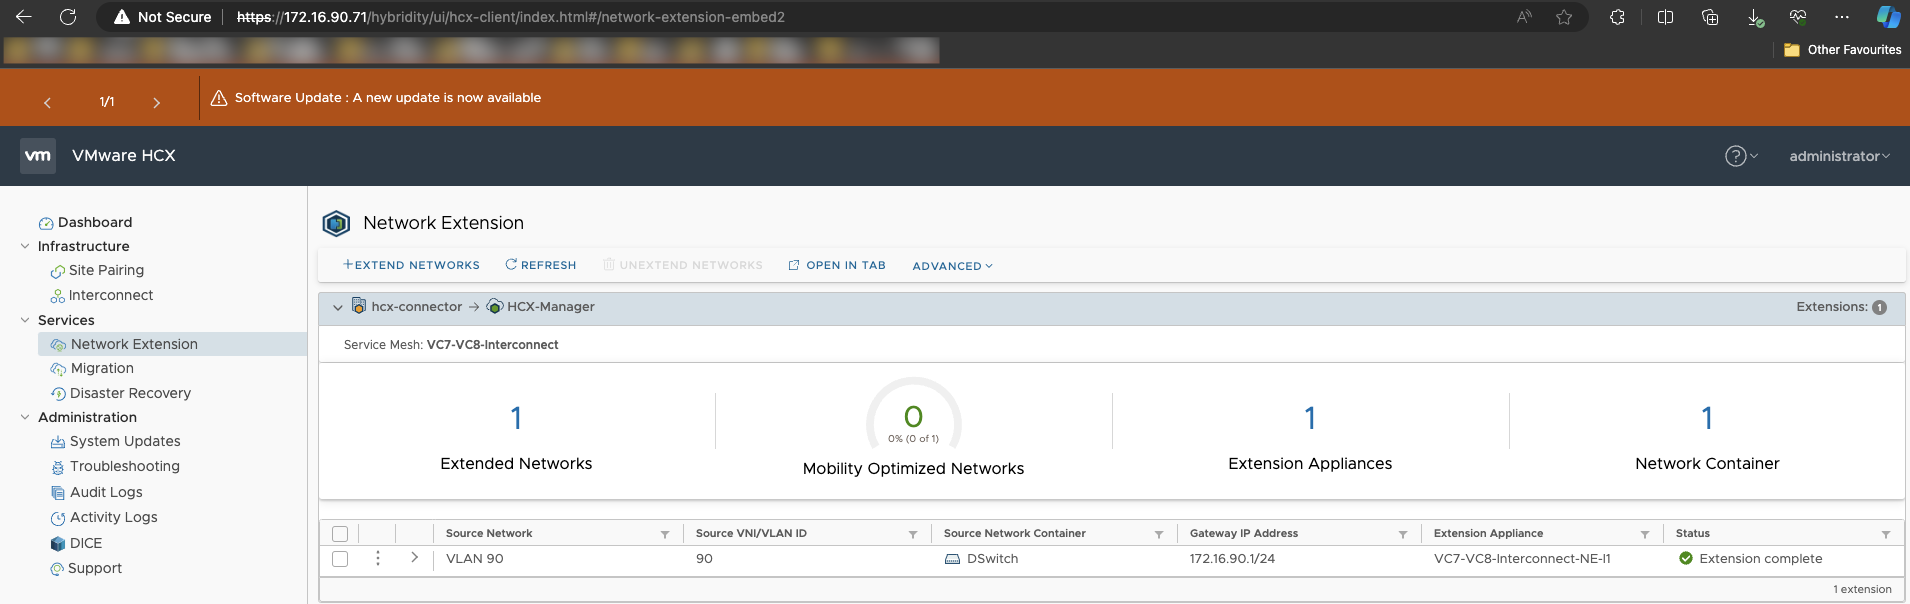
VLAN 90 is the network in use for HCX Management, and VLAN 72 is in use for the HCX Uplink, vMotion, and Replication. I have a test VM with an IP address of 172.16.90.209/24 assigned via DHCP. The source side HCX Manager is using 172.16.90.71/24. I then used HCX vMotion to move the VM to the cloud side and verified ping connectivity. Once all workloads are moved, the usual process would be to disconnect the stretch in the HCX UI choosing the option to connect the Cloud side gateway, and then shutdown the source side network. The HCX UI calls out that there may be a routing conflict which is why you would shut down the source side network.
“By default, the cloud network is disconnected from the cloud Edge Gateway after the network is unextended. This is done to prevent an edge gateway with dynamic routing activated from advertising the route of the network and causing a potential routing conflict with the network in the on-premises datacenter. Checking this checkbox will connect the network to the cloud edge gateway after unextension. If dynamic routing is activated, the network will be advertised from the cloud Edge Gateway and may cause a routing conflict.“
I figured I would try and unstretch to see what happened, in effect there would be two active gateways for the network and depending on the network configuration, the migrated VMs would likely become unreachable especially if it’s a physical network as connected networks are preferred over dynamic (ones advertised by BGP). This is what happened in my lab (UniFi connected network vs NSX advertised network over BGP) Whilst this is an option, due to the large variance of network setups, changing the HCX Manager IP address prior to unextening would be the preferred and safer option.
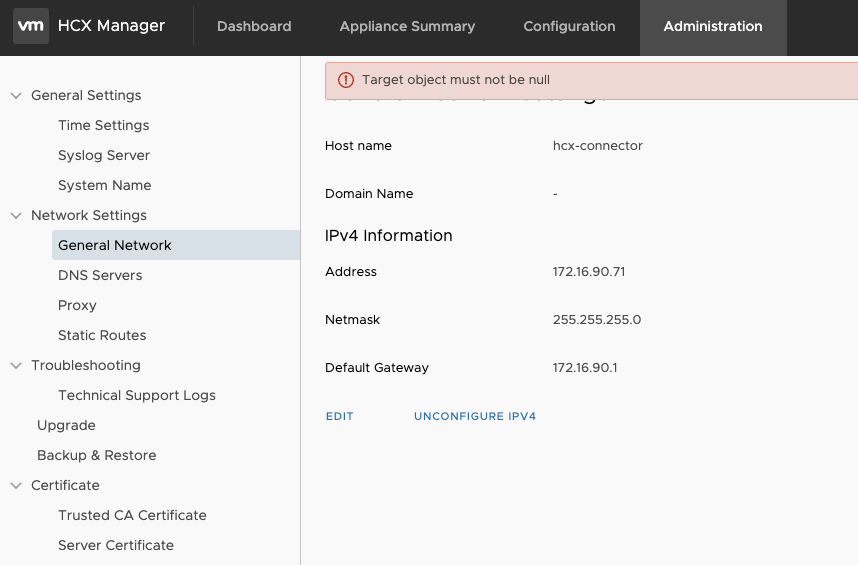
Seasoned administrators would head to the HCX VAMI console, change the IP in there and then change the VM settings to attach it to the new desired Port Group, however that doesn’t work and you’ll see the following error:
The workaround is to first take a snapshot of the HCX Manager. Then using ssh, su to root, and edit a networking file.
For HCX 4.3 and below it is /etc/systemd/network/wired.network file. For HCX 4.4 and above it is the /etc/systemd/network/10-cloud-init-eth0.network file. No one should be running 4.3 any more but you never know! If you are, upgrade first! However if you are blocked, use the wired.network file, the configuration is the same. There’s a DHCP file in there too, and it is a valid option for deployment, however I don’t know about the behaviour when using DHCP. I expect it might just work by attaching the VM on the new port group and rebooting.
admin@hcx-connector [ ~ ]$ su
Password:
root@hcx-connector [ /home/admin ]# cd /etc/systemd/network/
root@hcx-connector [ /etc/systemd/network ]# ls -l
total 8
-rw-r--r-- 1 root root 135 Nov  3 16:19 10-cloud-init-eth0.network
-rw-r--r-- 1 root root  52 Nov  3 15:30 99-dhcp-en.network
If you cat the file you can see the current network configuration. It is the configuration which is applied when the guest reboots, therefore you can safely edit it.
[root@hcx-connector /etc/systemd/network]# cat 10-cloud-init-eth0.network
[Match]
Name=eth0

[Network]
Address=172.16.90.71/24
Gateway=172.16.90.1

[Address]
Address=172.16.90.71/24
Broadcast=172.16.90.255
Before making any changes, make sure that there are no ongoing migrations!
As a snapshot of the HCX Manager has been taken and it’s safe to roll back, use vi to edit the file and input the new details. Make sure you don’t forget about the Broadcast line. Here’s my new network configuration (I run a mixture of .254 and .1 for my gateways, don’t ask). There are 4 lines in total to edit. Once edited, :wq to save. Verify the new configuration with cat:
root@hcx-connector [ /etc/systemd/network ]# cat !$
cat 10-cloud-init-eth0.network
[Match]
Name=eth0
[Network]
Address=172.16.72.71/24
Gateway=172.16.72.254
[Address]
Address=172.16.72.71/24
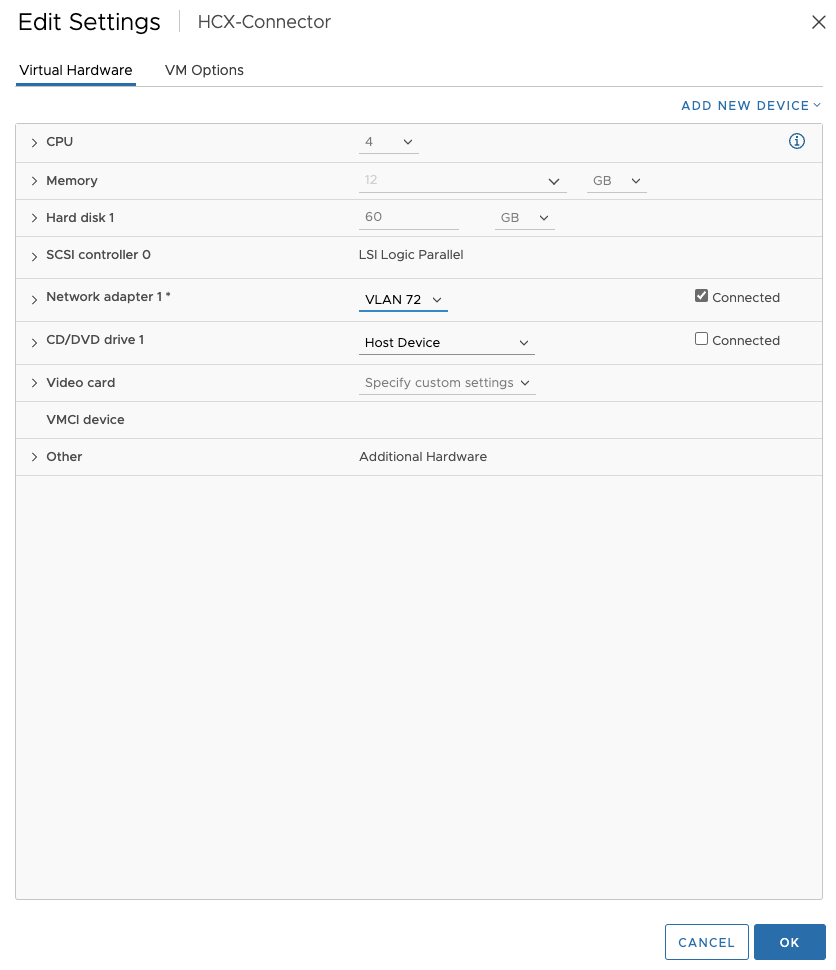
Broadcast=172.16.72.255Head over to the vSphere console, edit the HCX Manager VM and attach it to the new Port Group. Then initiate a Guest Reboot.
It might be a good idea to have a ping running to the new IP address, it should start responding fairly quickly (in my case it was around 5 seconds). If it doesn’t, revert to snapshot and investigate.
Once network connectivity has been verified, open up a web browser pointing to the new IP address. If you use host names, don’t forget to also update DNS records!
In my case, everything looked normal. I would resync any Service Meshes to be on the safe side, and leave the Snapshot for 24h at least.
As a footnote, this method has been tested on HCX 4.3.3 and HCX 4.6.1. I will again call out that this is completely unsupported and remind you that you should engage GSS in the first instance. Or better still, don’t deploy the HCX Manager on a network you intend to stretch in the first instance!
Thanks for reading.
This process worked a treat. You saved me a LOT of hassle. Thanks so much!