HCX+ Initial Availability has recently launched and it is part of Project Northstar, which is essentially SaaS delivered multi-cloud Networking and Security. Rather than paraphrasing what HCX Product Manager Gabe Rosas has already written about HCX+, I’ll quote his words here:
On a foundation of true & tested workload VMware mobility technologies, HCX+ provides a streamlined solution to workload migration and mobility needs in the multi-cloud world. This new service will deliver operationally valuable capabilities including centralized orchestration, simplified deployment, lifecycle management, and enhanced reporting and visibility. HCX+ is a SaaS offering launched under the Project Northstar umbrella of services.
Gabe Rosas – https://hcx.design
If you are managing a large deployment of HCX, then HCX+ may be suitable due to the above. It gives you that simple, single pane of glass view of your whole HCX deployment, rather than having to log into all your of your individual managers to drive migrations or perform updates/configuration. This is clearly not aimed at a simple deployments of HCX with on-premesis connecting to VMC on AWS as an example, but rather larger deponents where you may have multiple geographical sites such as VCF deployed across the globe, or multiple VMware Cloud deployments in different hyperscaler environments.
The folks in the HCX BU were kind enough to let me have a test drive of the product, so thank you very much!
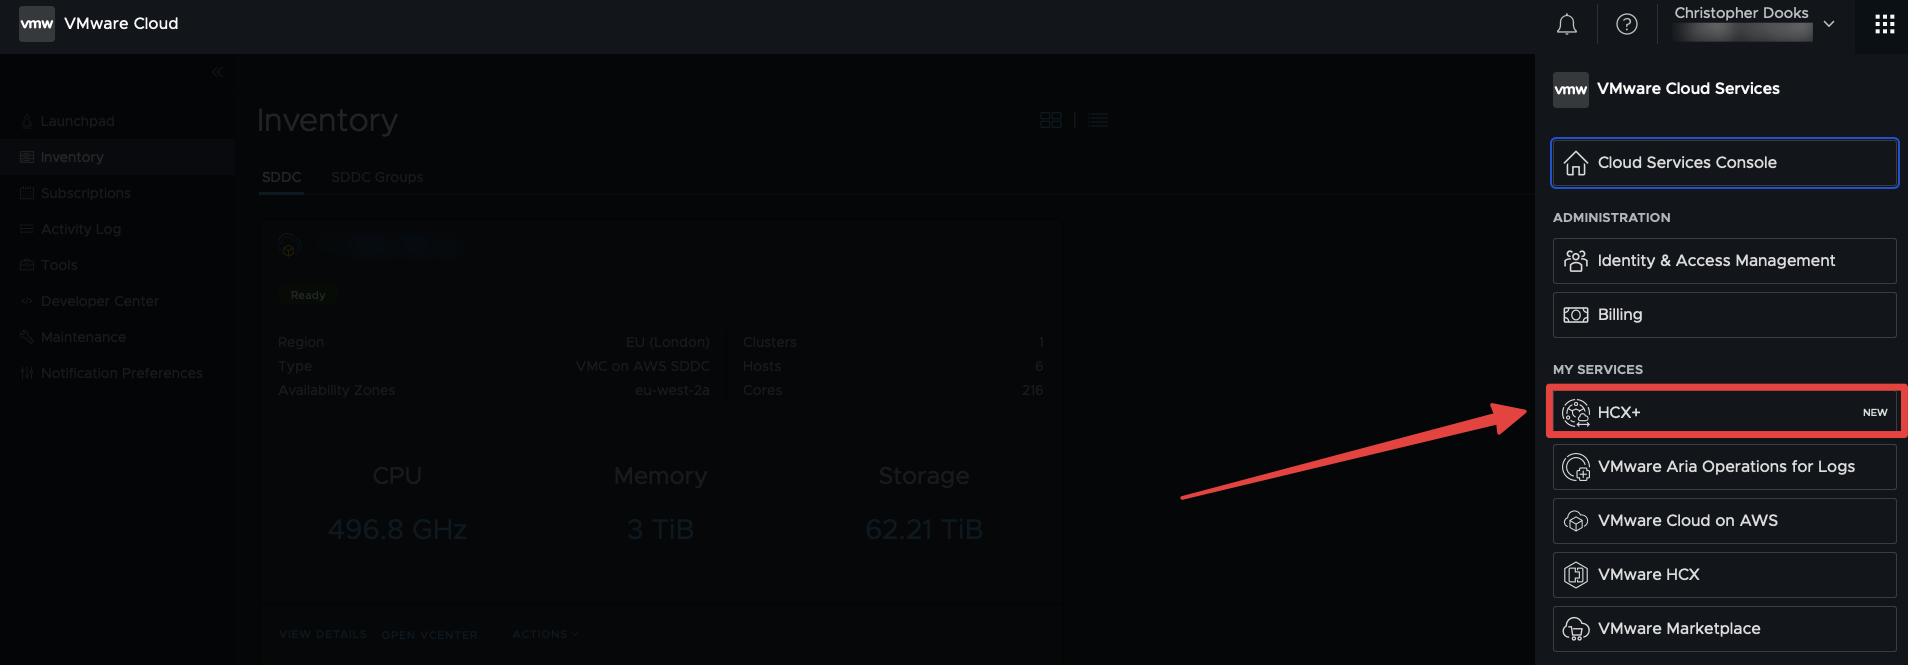
Once onboarded, you can access HCX+ in the same way you access other VMware SaaS offerings in the VMware Cloud Console at https://vmc.vmware.com and then selecting the application menu at the top right of the screen, or by going to https://hcxplus.vmware.com once signed into the correct Org.
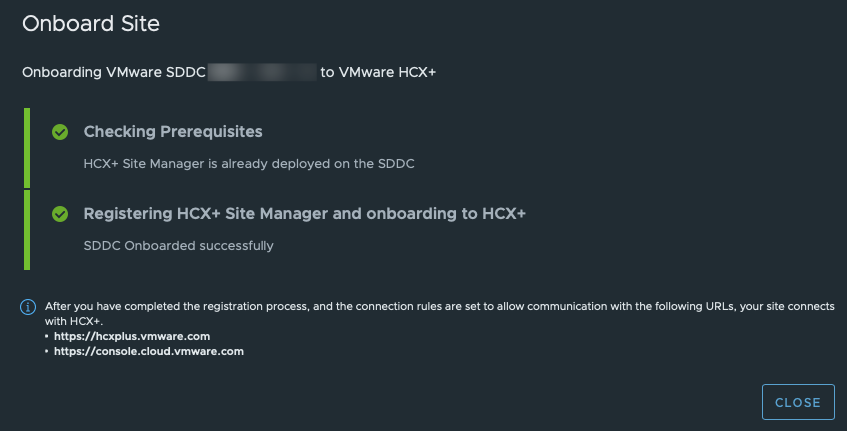
The SDDC in the org needs to be on-boarded to HCX+, which will go away and deploy a HCX+ Site Manager (HSM for short) if not already deployed, if one exists it will register it with the HCX+ service. Note, the name and build number of HSM appliance differs to the ‘vanilla’ HCX appliances, please don’t get them confused and they are not designed to work with one another. You either have to use the original HCX, or use HCX+. It is not designed to have part of one and part of another.
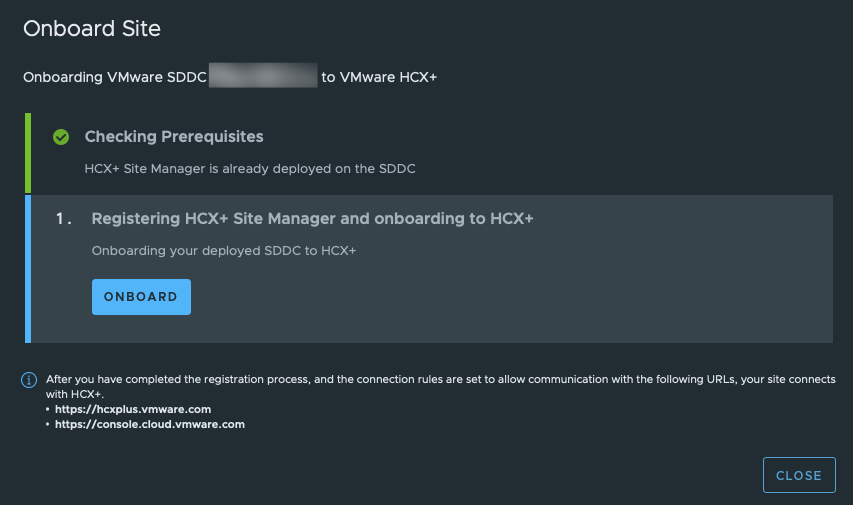
All being well it will be registered:
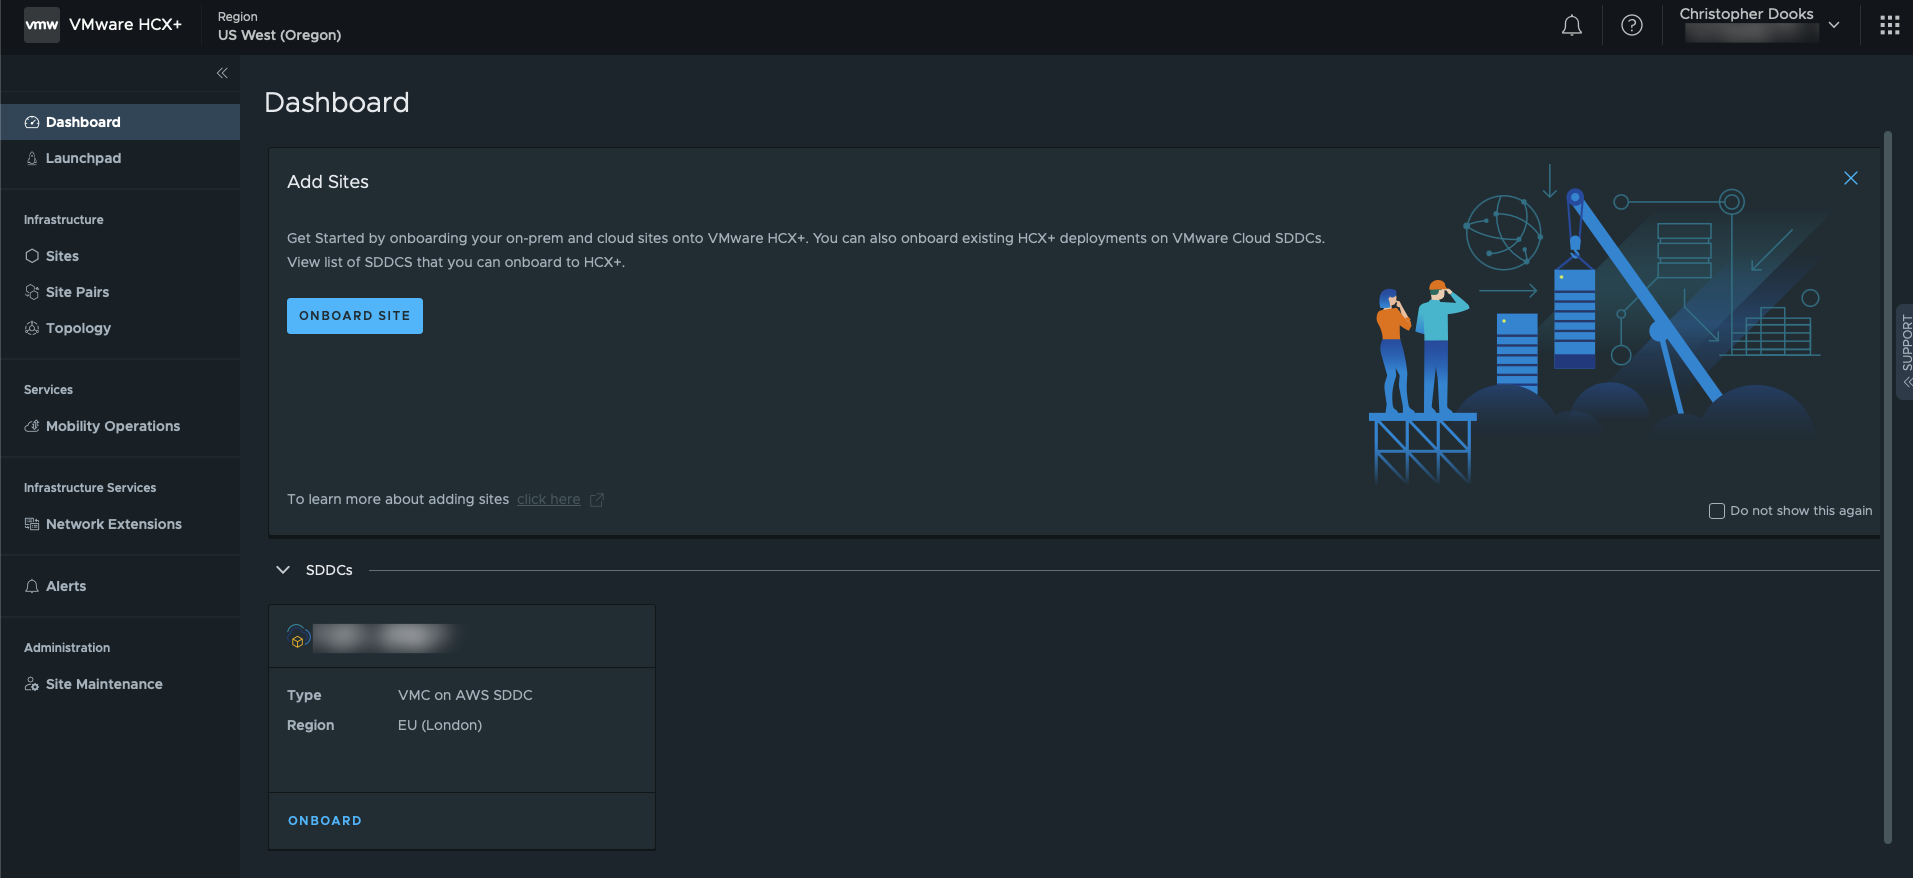
With the SDDC onboarded, the next step is to on-board my homelab. It’s possible to to do this via Launchpad > Journey:
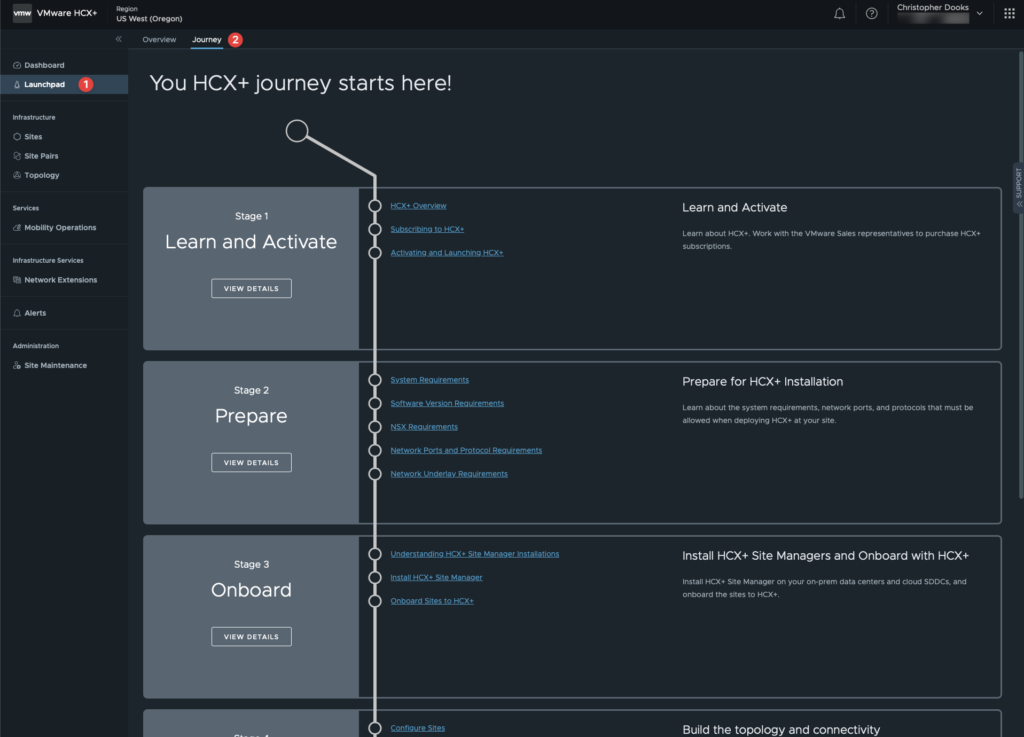
This will walk you through the process end to end and is suited to customers who have never used HCX before. It’s rather excellent, and in-depth. For those who have used the original HCX before, you will know that for beginners some of the concepts and terms HCX uses can be a little confusing. Once thing which HCX+ excels at is making the whole deployment and setup process much simpler. Kudos to the team behind the scenes, I know months and months of hard work and late evenings has gone into this.
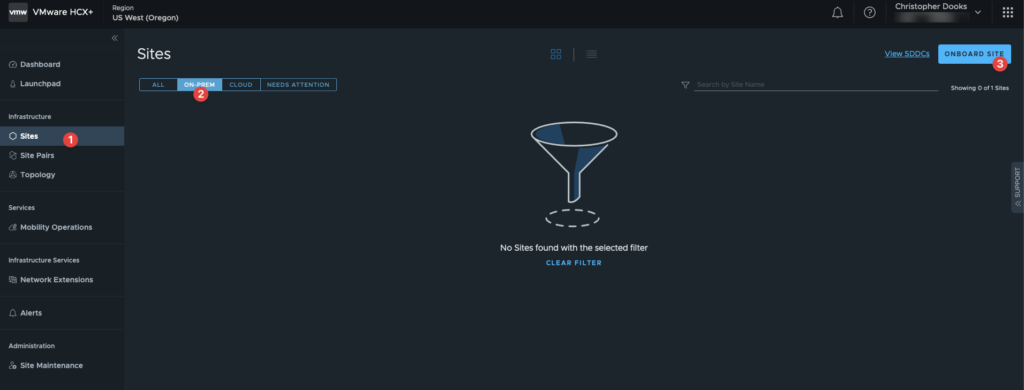
I’m going to choose to onboard a site by hand, by going to Sites > On-Prem > Onboard Site:
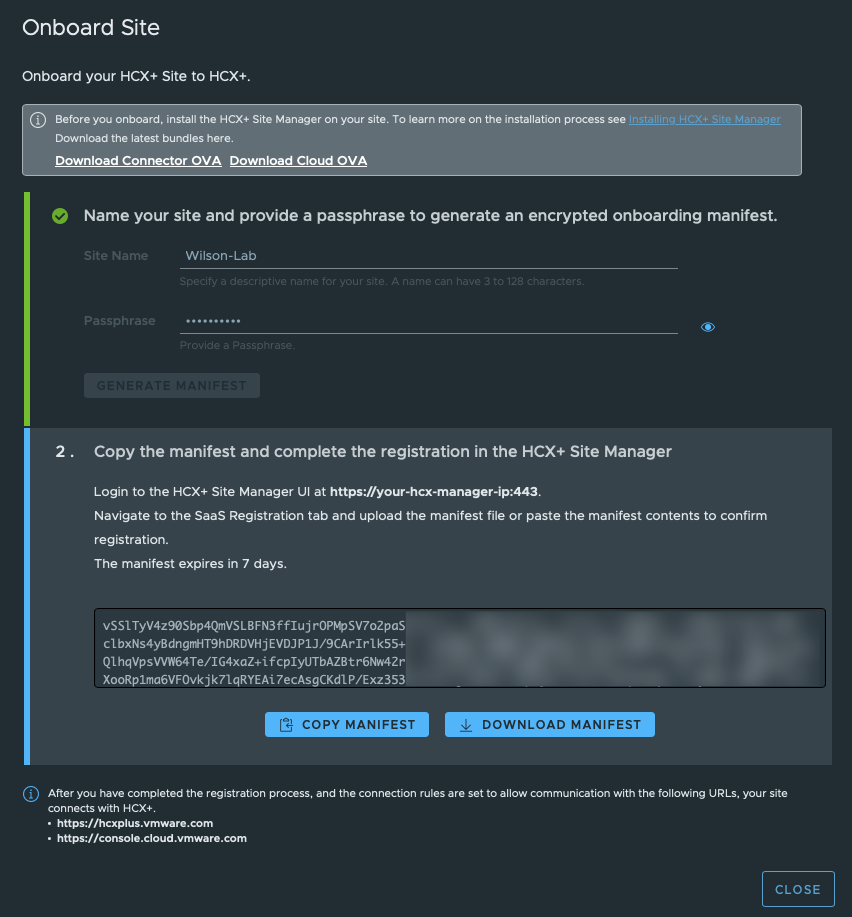
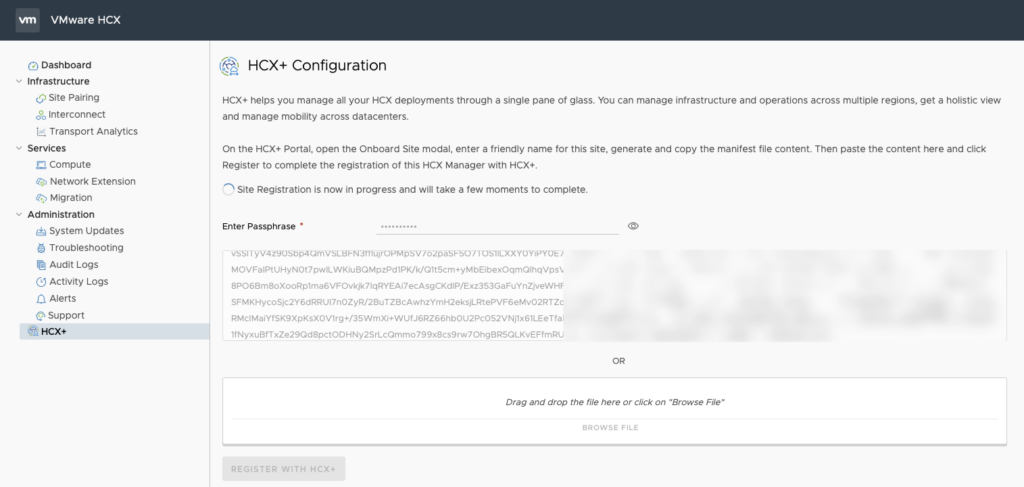
On the next screen, we need to name our site and provide a passphrase, you will then be given a manifest which will allow you to register the deployed HSM to the HCX+ service. The download links for Connector and Cloud OVA are here also.
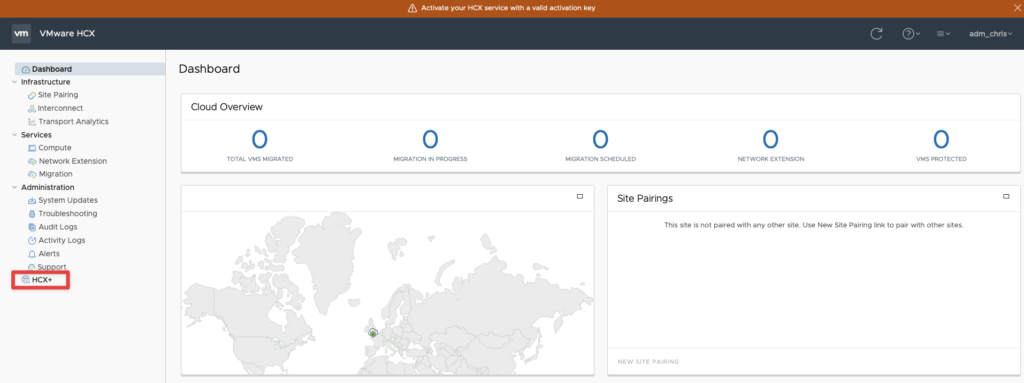
Once downloaded, deploy the OVA as you would with any other and wait for the appliance to boot. Note: unlike the screenshot above, you first need to go to https://<appliance ip>:9443 – I have raised feedback for this to the product team. Choose the activate later option when asked, apart from that, set it up like you would with normal HCX, ie, registering to vCenter, NSX if applicable, once done and services are restarted, you can go to the normal webpage on port 443 (HTTPS) as per the screenshot armed with your HCX+ Manifest key. The UI looks the same as normal HCX, with the exception of the HCX+ button.
It’s in here where you enter your passphrase and manifest.
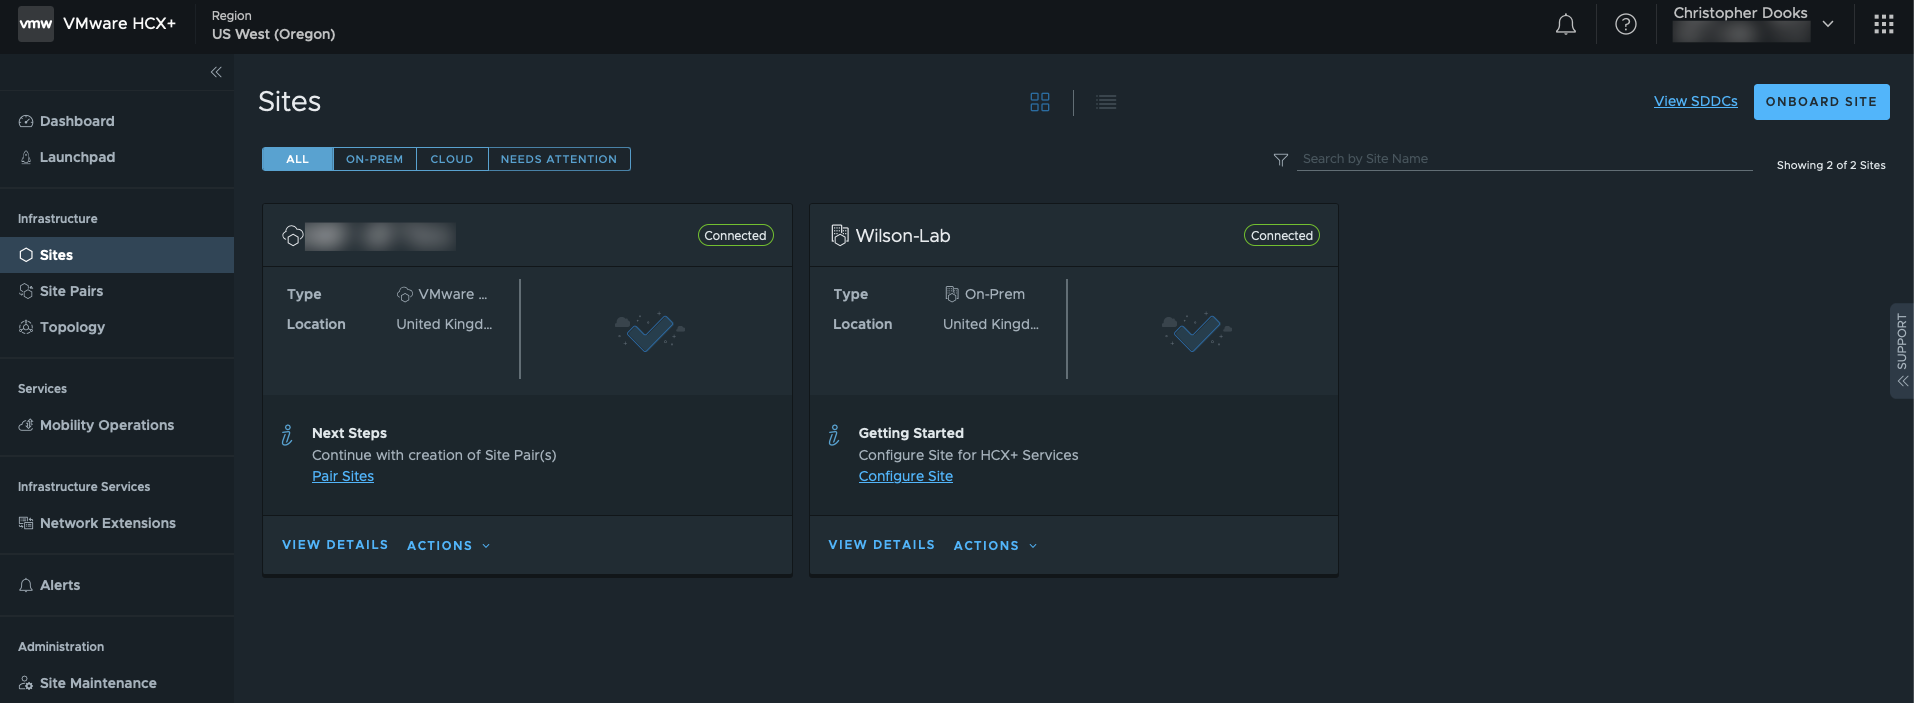
After some time, you should see your on-prem site appear in the HCX+ console. If this process doesn’t work, check the usual culprits such as firewall, routing, proxy configuration etc.
An important note: whilst you may be able to drive certain parts of HCX from the web UI, you should perform everything from the HCX+ SaaS page instead unless otherwise instructed by the documentation or VMware support.
If you were using HCX, the next step would be to configure site pairing. However this has changed with HCX+, as now when we pair sites it expects all sites to be configured and it will warn you as such:
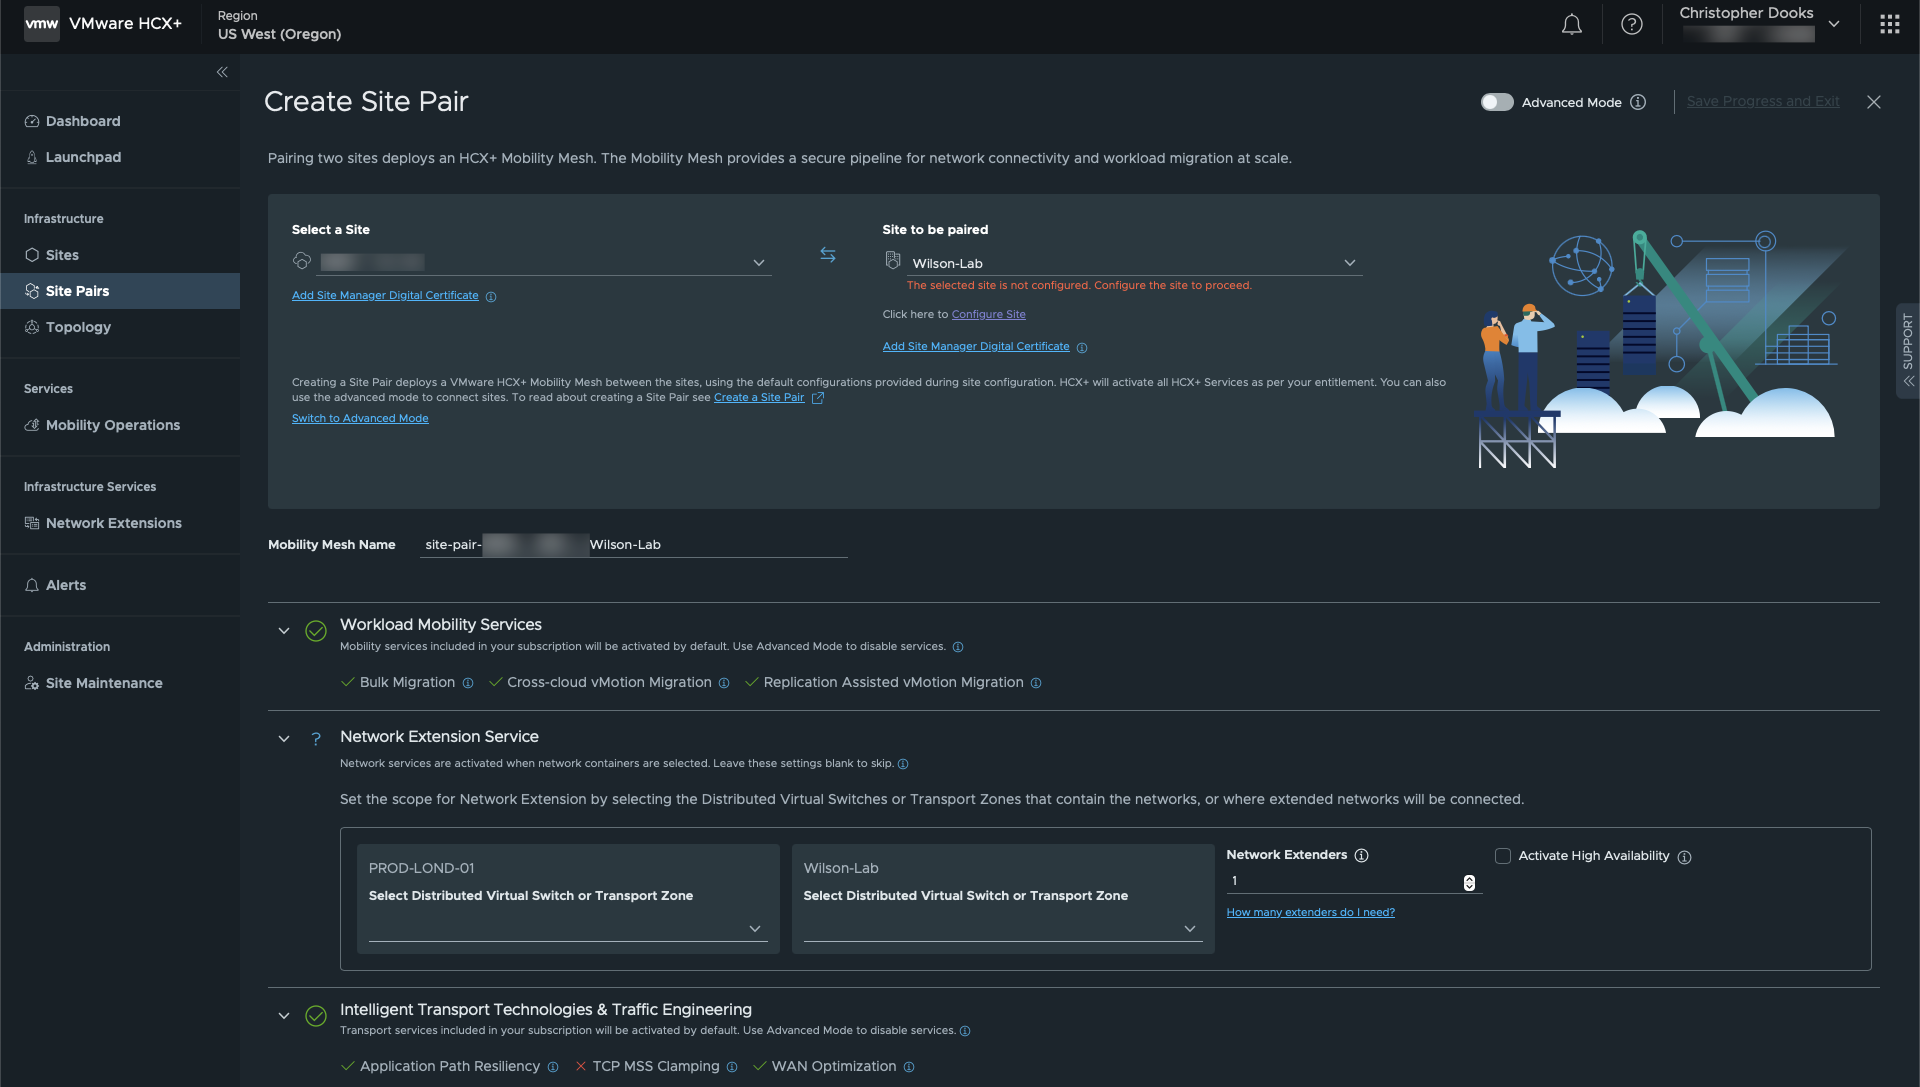
Effectively, Site Pairing, Compute Profiles, Service Mesh, and Network Extension have been concatenated into the same workflow which greatly simplifies the process of pairing sites. I will soon publish part 2 of this HCX+ article which walks through setting up the site pairing, and depending on the number of screenshots I include, may include stretching a network and migration, or that might be pushed out into part 3.
Stay tuned, and thanks for reading!
1 thought on “A quick look at HCX+ part 1 – onboarding your SDDC and on-prem sites”