HCX OS Assisted Migration is a migration method within HCX where we can move supported guest OS VMs from a Hyper-V or KVM environment. The process to do so is once you have a functioning Service Mesh, you download a Sentinel agent and then install it on the VMs in scope for migration. Shortly afterwards, the Sentinel agents will register with the Sentinel Gateway and it can be seen in the HCX UI. Once there, you can migrate the VMs in a similar manner in which you migrate VMs located in a legacy vSphere environment. This is a really nice method where customers wish to move workloads from Hyper-V or KVM into a new VCF deployment as an example.
Please note that like single site bulk migration, and OSAM single site migration is not supported in public cloud deployments such as VMC on AWS, AVC, GCVE etc.
I recently blogged about how you can use HCX to Bulk Migrate VMs from one cluster to another within the same vCenter server. In that post, I said it was one of two supported configurations for a single site HCX deployment (to my knowledge). This is the second supported configuration, albeit requiring the Enterprise license level. Remember to deploy the Cloud Manager first and then the Connector so the correct plugin is registered to the vCenter Server for ease of use. A quick high level overview:
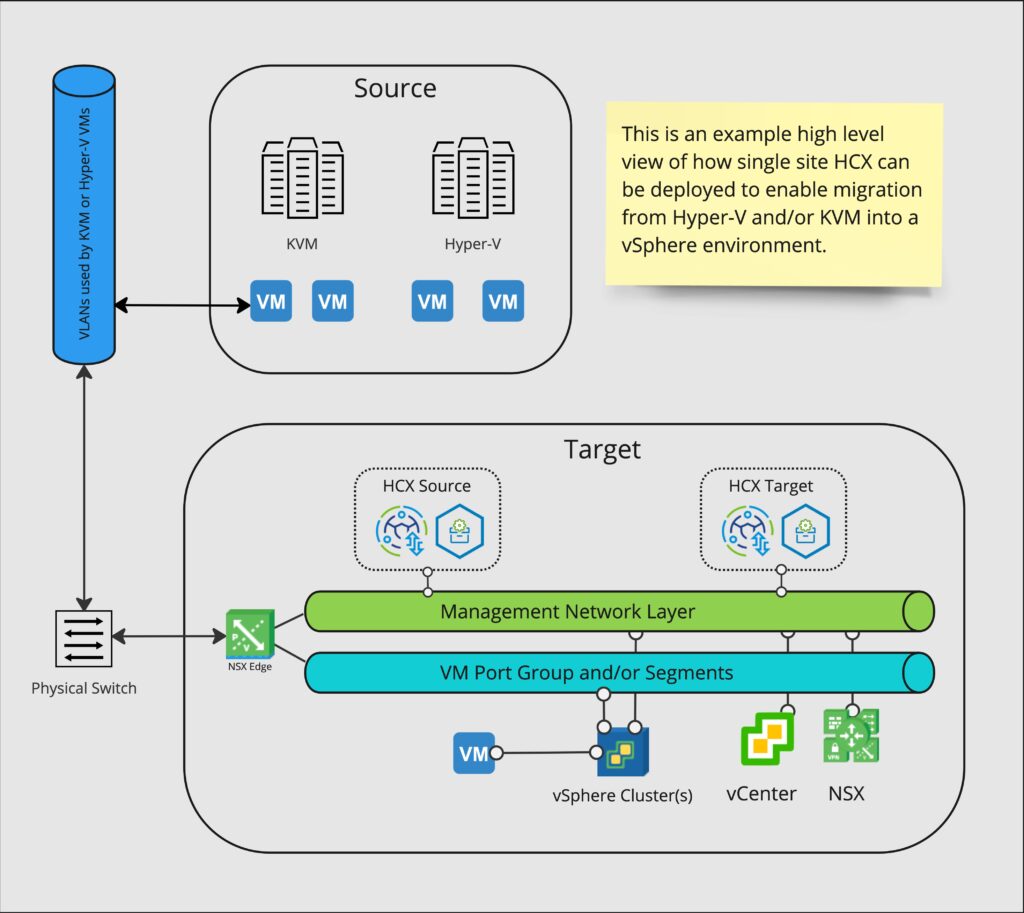
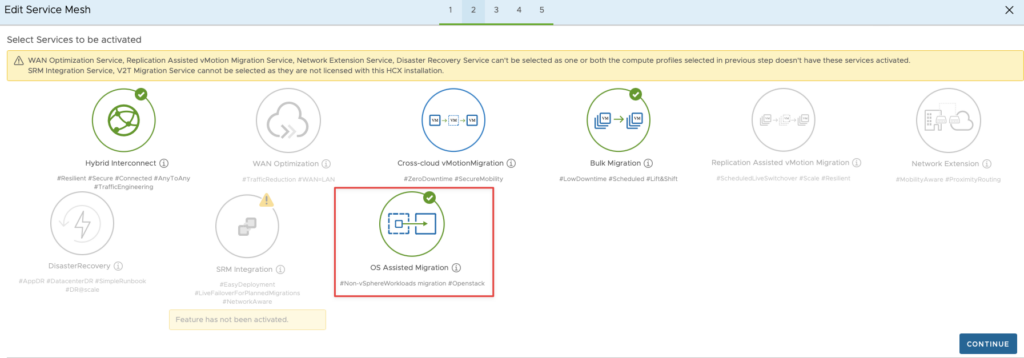
Both the HCX Connector Cloud Manager and Connector both registered with the same vCenter server. On the Compute Profiles the OSAM service is enabled, plus it also selected on the Service Mesh configuration page.
I’m going to demonstrate this process in my lab. My ‘KVM’ host in this case is my Synology NAS, which is running an Ubuntu 18 LTS VM. Whilst Synology uses QEMU rather than KVM, it happens to work by chance as they are somewhat related. In production, the source must be Hyper-V or KVM in order to be supported.
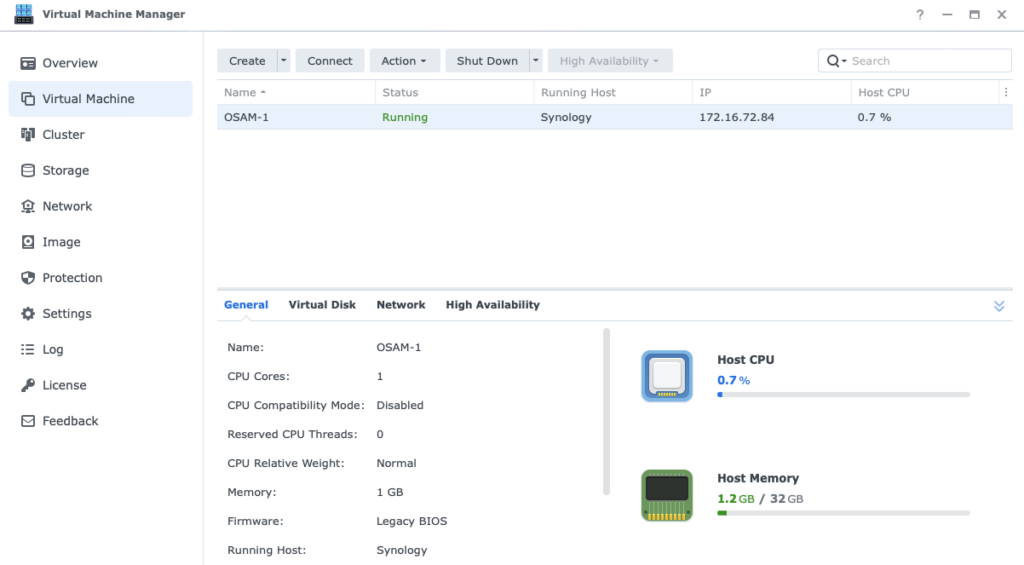
Again, please check the HCX Documentation for supported guest OS versions, there are other non-HCX options for unsupported guests such as vCenter Converter. There’s nothing special about the VM, it’s an Ubuntu Server build with nothing else on it but the qemu tools.
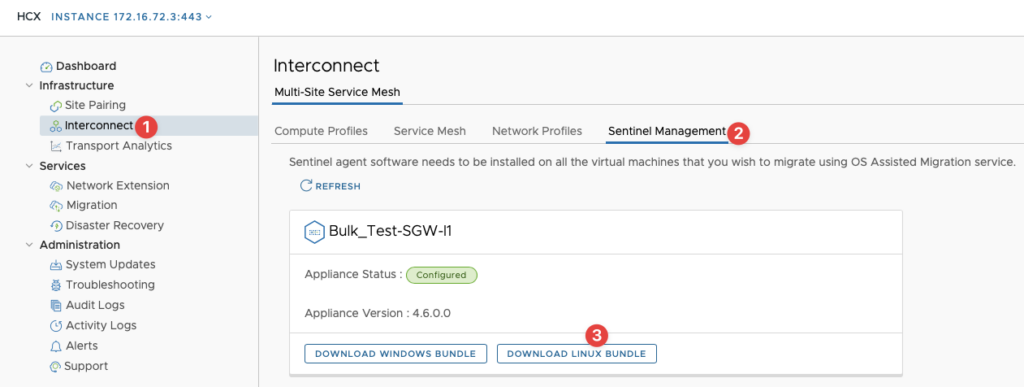
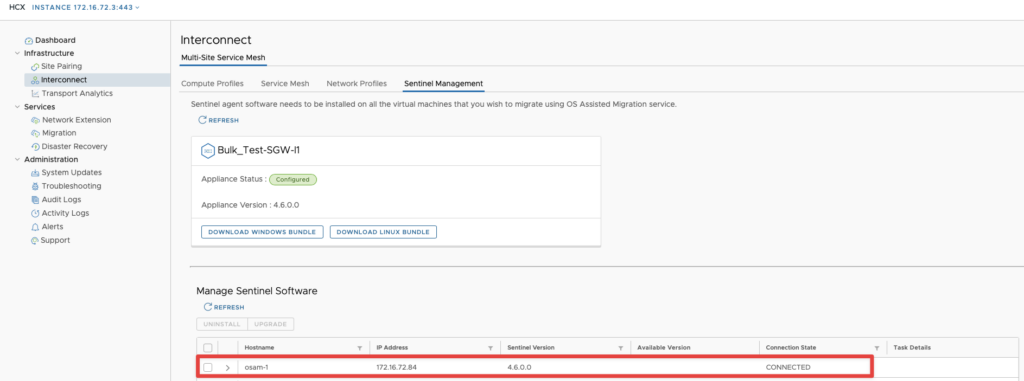
With the Service Mesh deployed and the OSAM Service Activated, log into the source HCX Connector, select Interconnect, then Sentinel Management, then Download Linux Bundle. If you were migrating supported Windows VMs, then select the the Windows Bundle. If you’re using SCCM (now called Endpoint Management) to manage Windows workloads, you can automate the agent deployment process, check out my blog post about it. I might cover Linux install automation in the future.
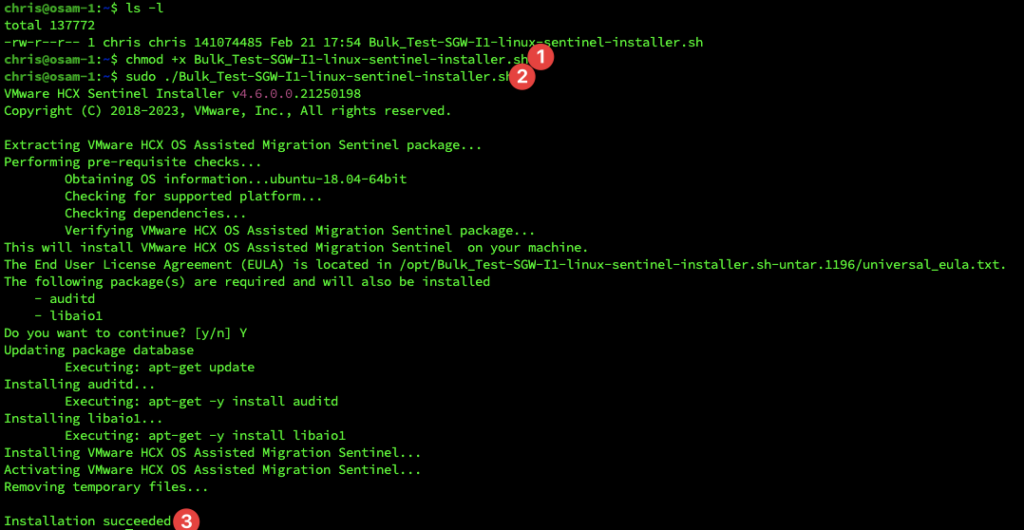
You need to copy the downloaded sh file using SFTP or similar to the host, make it executable and then launch it as root, providing the OS is supported, you should see no errors. You might have to install additional packages, if asked, press y, or use the quiet install method with the -q switch.
Shortly after, you should see the VM appear in the source HCX UI, ensure the state is connected:
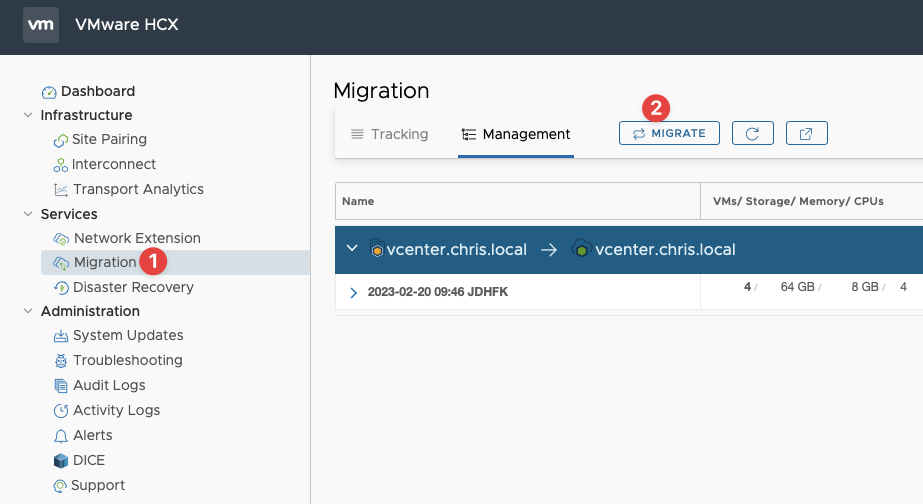
Once the VM is showing, head to the migration screen and select Migrate.
You need to choose the non-vSphere Service Inventory as the source.

Once selected, it will show all VMs which have the agent install and are registered with the Sentinel Manager. Choose what you want to migrate, the click Add.

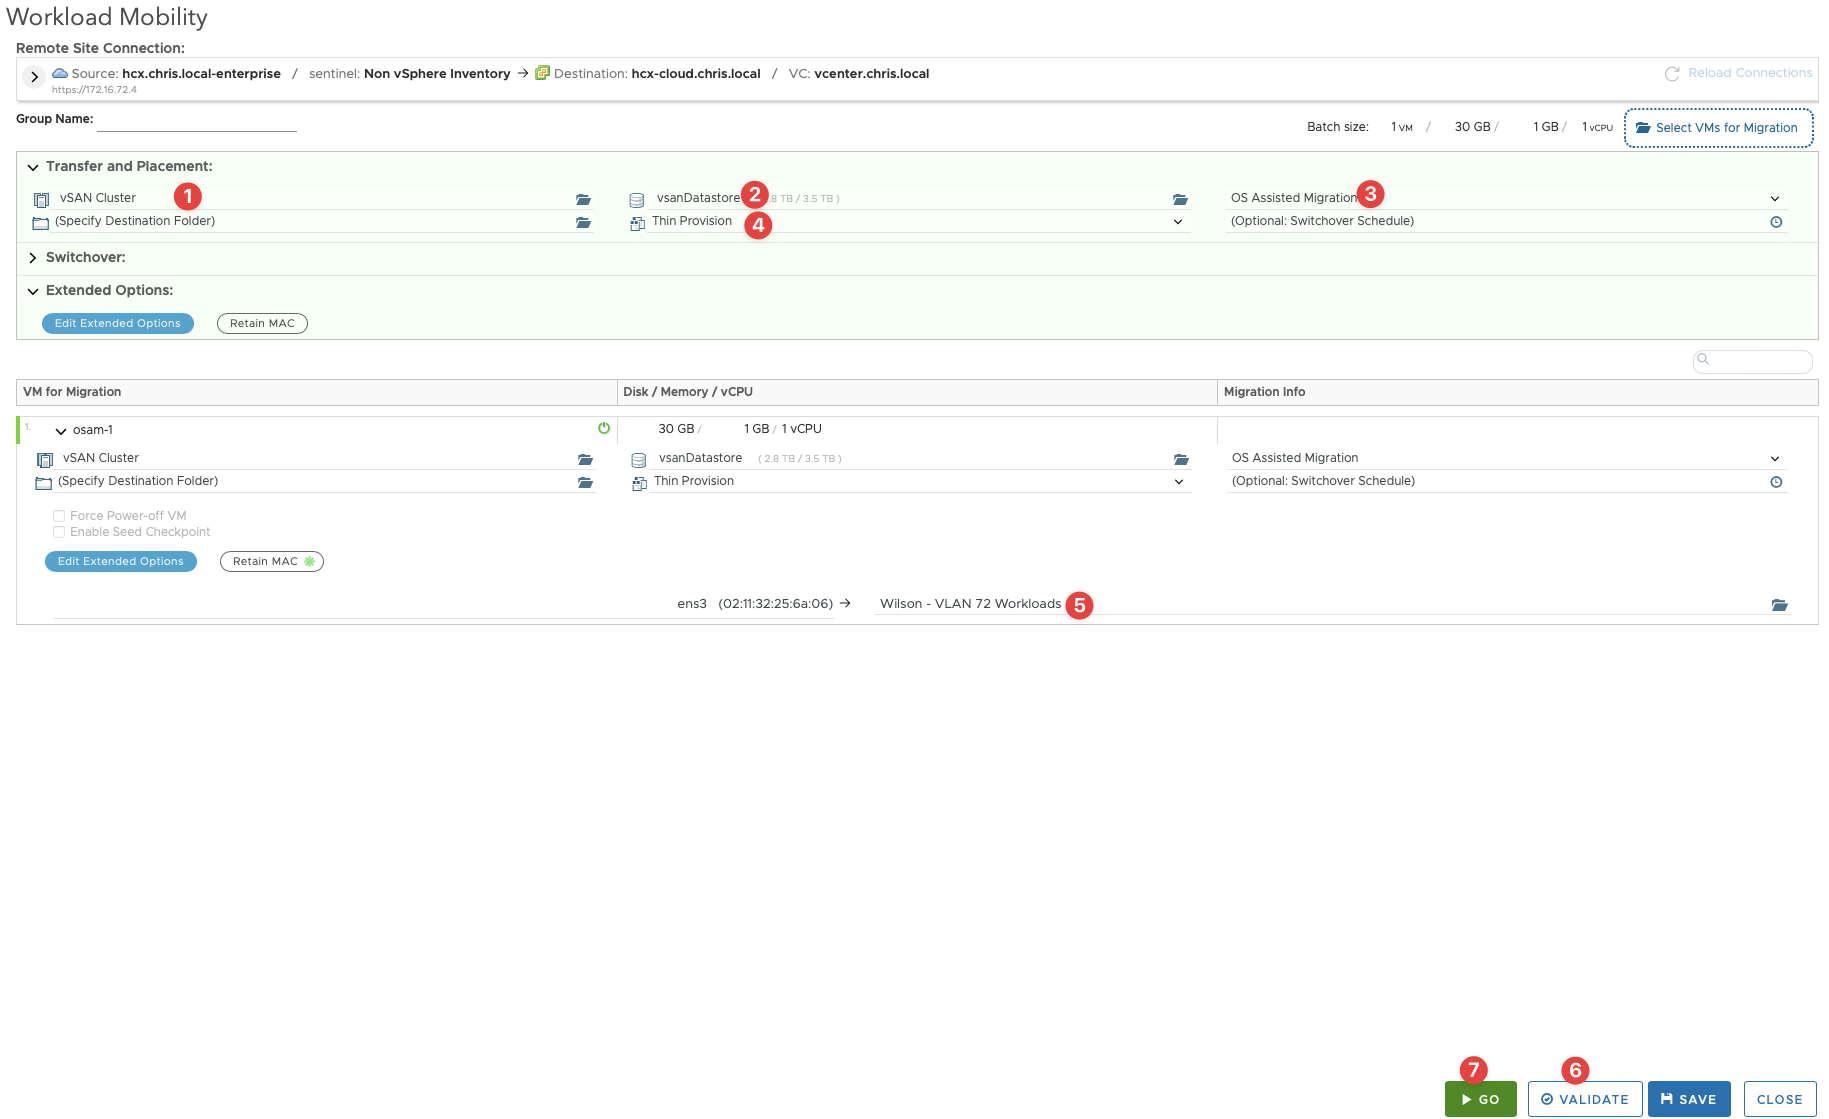
Those familiar with HCX will know the migration screen well. There are some fields which are mandatory before you can start the migration. I’ve numbered them in my screenshot. Essentially, you are just telling HCX where in our destination vSphere inventory we want to place our VMs, what Datastore, the provisioning method, and guest NIC to Port Group mapping etc. Validate, then if all is fine, go ahead with the migration.
You’ll then be taken to the migration management screen, where if you wish you can expand the migration group we created to check its progress. It may take a few minutes for any events to show.

After some time (depending on the size of the VM, your network speed etc), the VM will be shut down at source (KVM, or even Hyper V) and a new one powered on in our vSphere inventory. There will be some fixup operations on the migrated VM, you’ll see it boot into Photon first whilst it does some disk and network operations amongst other things, once complete the VM should boot without issue.
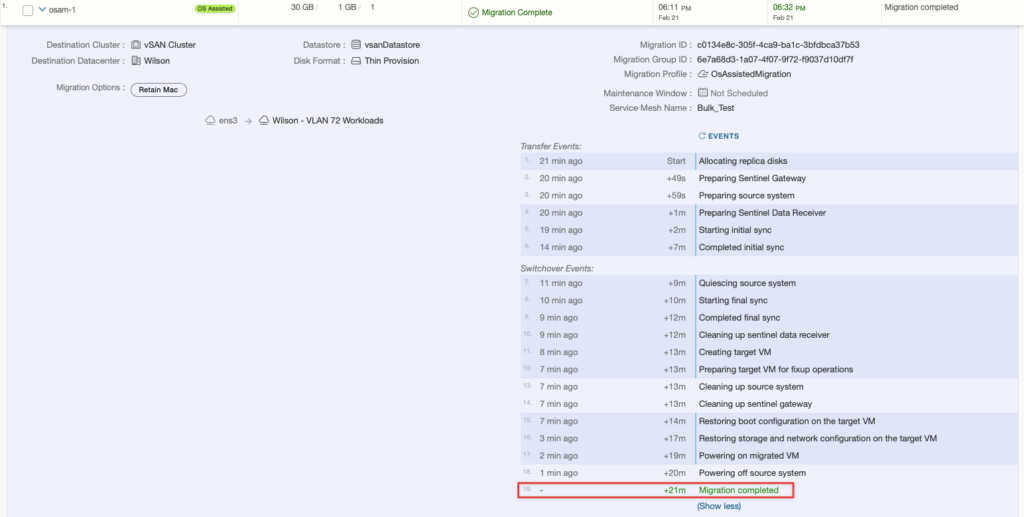
Migration complete! The OSAM process is largely the same if you have a conventional HCX deployment, I just wanted to demonstrate how it looks in a Consolidated Architecture.
2 thoughts on “Single HCX site installation supporting OSAM Migrations (HCX Consolidated Architecture)”