A question came up in an internal Slack channel whether VMware had written a guide on installing the OS Assisted Migration (OSAM) Sentinel Agent via Microsoft’s SCCM (now called Endpoint Manager) software. I don’t think such a guide exists, so I thought ‘how hard can it be?’ and decided to give it a go. The answer is… more difficult than I thought! But this would be very simple for experienced SCCM administrators.
It’s actually something which would be very beneficial to many customers looking to leverage HCX to migrate their Hyper-V VMs into a vSphere environment such as VMC on AWS or VCF.
Currently, in order to install the Sentinel agent onto a VM you have to download the Sentinel bundle from the HCX manager and then run the installer. After install, the VM will show under Sentinel Management within the HCX Manager as Connected (if there is network connectivity and ports are open). This could become quite tiresome if you have 50 VMs to migrate, and even more so if you had 500 or more! SCCM (now Endpoint Management) is a Microsoft product which does many things besides annoying users about Windows updates and OS restarts. One of its abilities is distributing and installing software to clients. If you have 500 VMs you want to migrate into vSphere and you have SCCM deployed, then using it would be a sensible thing to do.
I’ll say right now, I am far from an SCCM expert (or even novice!). I didn’t have SCCM set up in my lab, it was something I had to install and configure in order to demonstrate how we can distribute the Sentinel software. Part of that involved a lot of Googling and research to try and get it to work. Whilst this method has worked in my own lab environment, there may be better ways to achieve the same result. I think I have logged into SCCM more times in the past few days than I ever had before. I also realise that there are other ways to distribute exe files instead of SCCM in a Windows house, but this is not something I have looked into yet.
This post assumes the following:
- HCX is installed and configured, with a functional Service Mesh deployed with the OSAM enabled
- SCCM is installed, configured and functional (devices, boundaries, distribution points etc)
- The SCCM Agent is installed on the Windows guests you wish to deploy the Sentinel Agent on, and the devices are appearing in SCCM Manager
- All required firewall ports open (SCCM Manager, SQL Server, HCX etc)
A very quick run down of my environment:
- vSphere 7U3 (the new one!)
- HCX 4.3.1 (paired with VMC on AWS), plus functioning Service Mesh with OSAM enabled
- Microsoft AD and DNS configured (2016 Functional level)
- Server 2019 VM with SQL Server 2016 SP3, plus SCCM (now Endpoint Configuration Manager) version 2010 installed
- Not essential, but I’d highly recommend Microsoft’s CM Trace Tool for log analytics
Don’t forget, HXC OSAM has a list of supported guest operating systems, so ensure what you intend to migrate is listed. Here’s the list for HCX 4.3.
With that out of the way, here is how I did it in my lab.
First of, we need the actual installer files. Head to HCX > Interconnect > Sentinel Management, then Download Windows Bundle.

You will get a Zip file called windows-sentinel-bundle with 3 files inside. Unzip the folder and copy/move it to your SCCM Server. I created a share called Staging on the root of the C: and shared it with everyone. In a Production environment this isn’t the best idea, but given that this is a lab it will suffice. In a Production environment, my assumption is that the downloaded HCX folder would go on any existing shares for application deployment. It’s important to keep the 3 files together within the folder.
Next log in to the SCCM/Endpoint Manager console (I’ll call it SCCM Console to keep things simple) and head to Applications under Software Library.
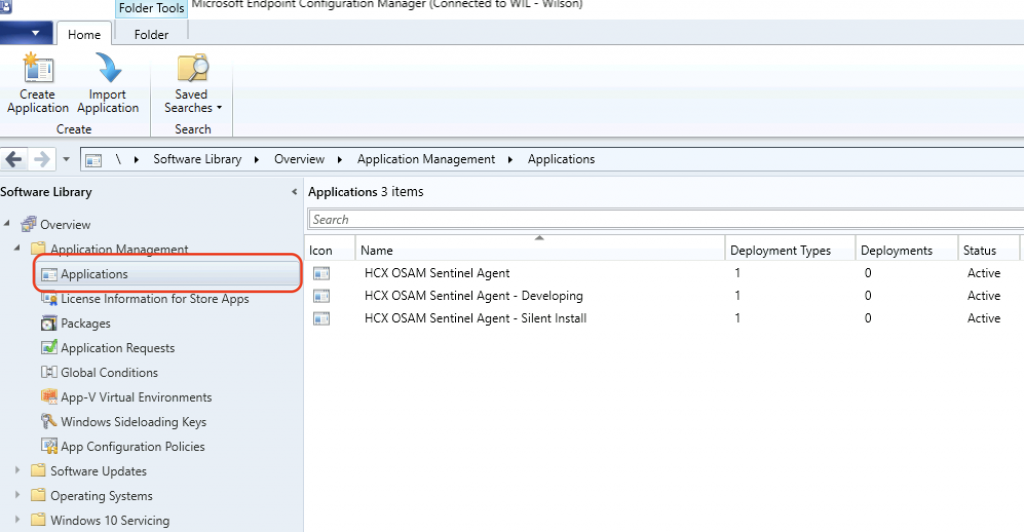
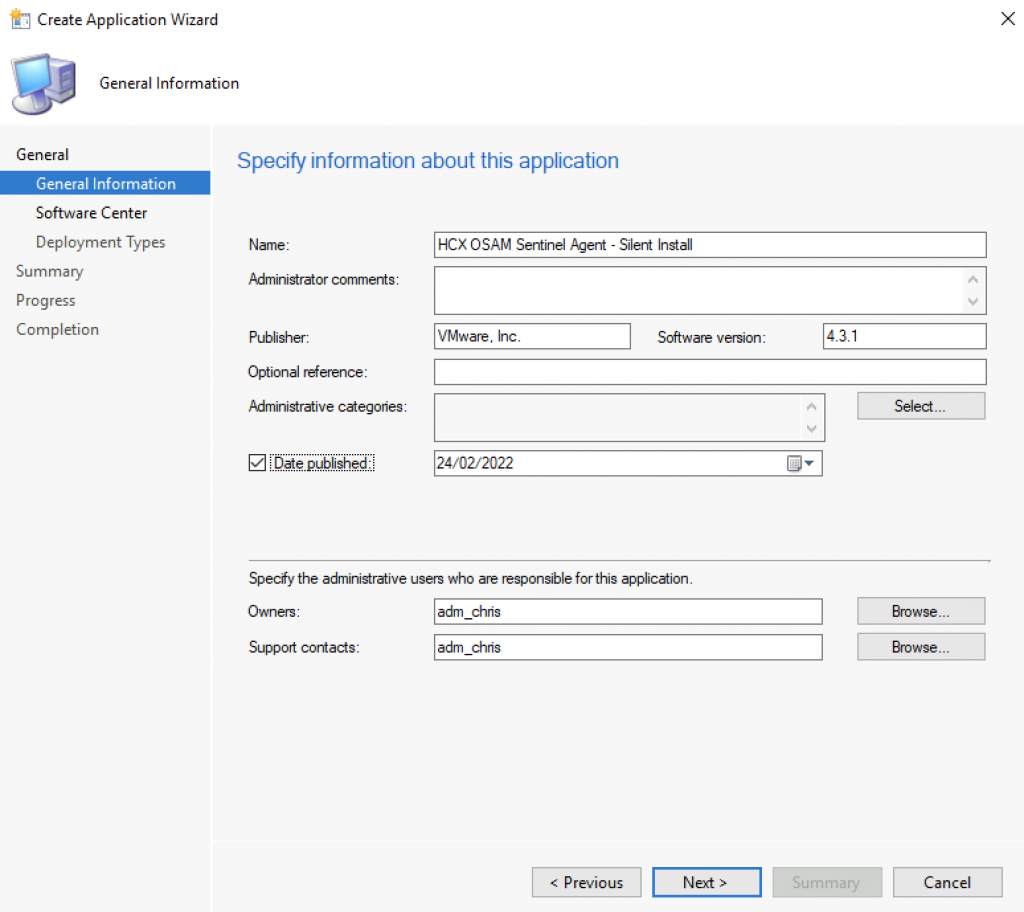
You can see my existing Applications here where I have been testing. Right click and Create Application. Choose Manual, then next. Enter the details of the OSAM Installer here. What you put here largely doesn’t matter (as it is what would be displayed to users within Software Center, but we are configuring a silent install). Mine looks like this:
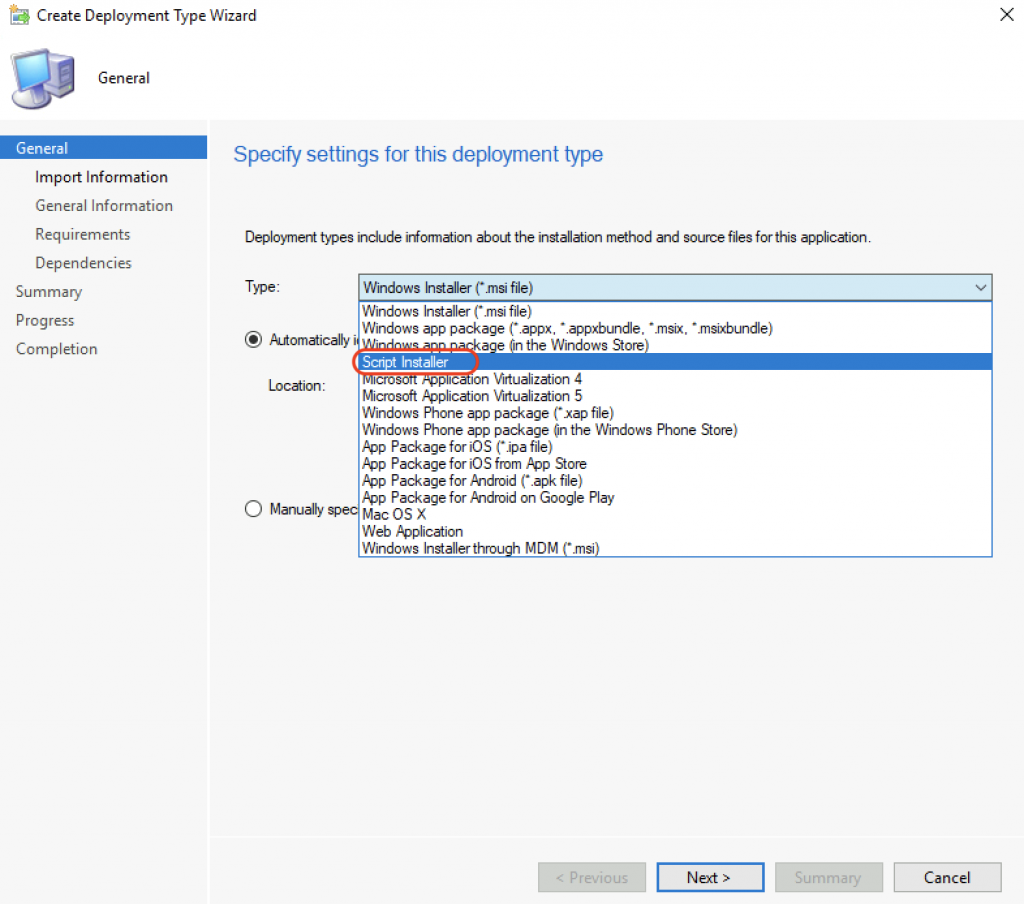
Click next and again on the Software Center screen (since we want a silent install for automation, we don’t want it to show in the Software Center for users). On Deployment Types click Add. On the next screen, select Script Installer in the dropdown then next.
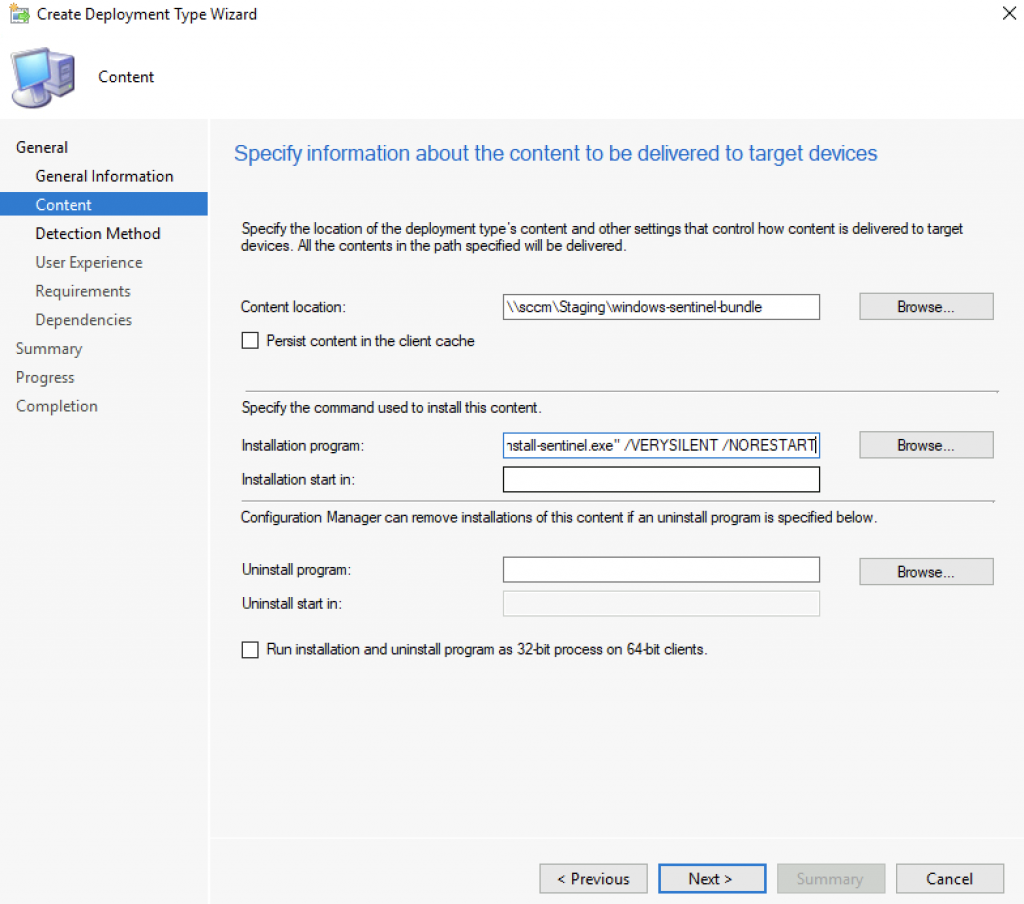
Give it a name again, such as HCX Sentinel Agent and click next. Under content, use the share we created above and select the folder ‘windows-sentinel-bundle’. Put “install-sentinel.exe” /VERYSILENT /NORESTART in the Installation program field.
"install-sentinel.exe" /VERYSILENT /NORESTARTLeave Uninstall program empty (for one, if we are migrating, we don’t want to uninstall and two, I don’t think there is a silent uninstall).
On the next screen we define how SCCM knows whether the agent is installed or not. Select Add Clause and %ProgramFiles%\VMware\HCX\OSAM under path and sentinelService.exe for file name. Leave the 32/64bit checkbox unchecked. Click next.
%ProgramFiles%\VMware\HCX\OSAM
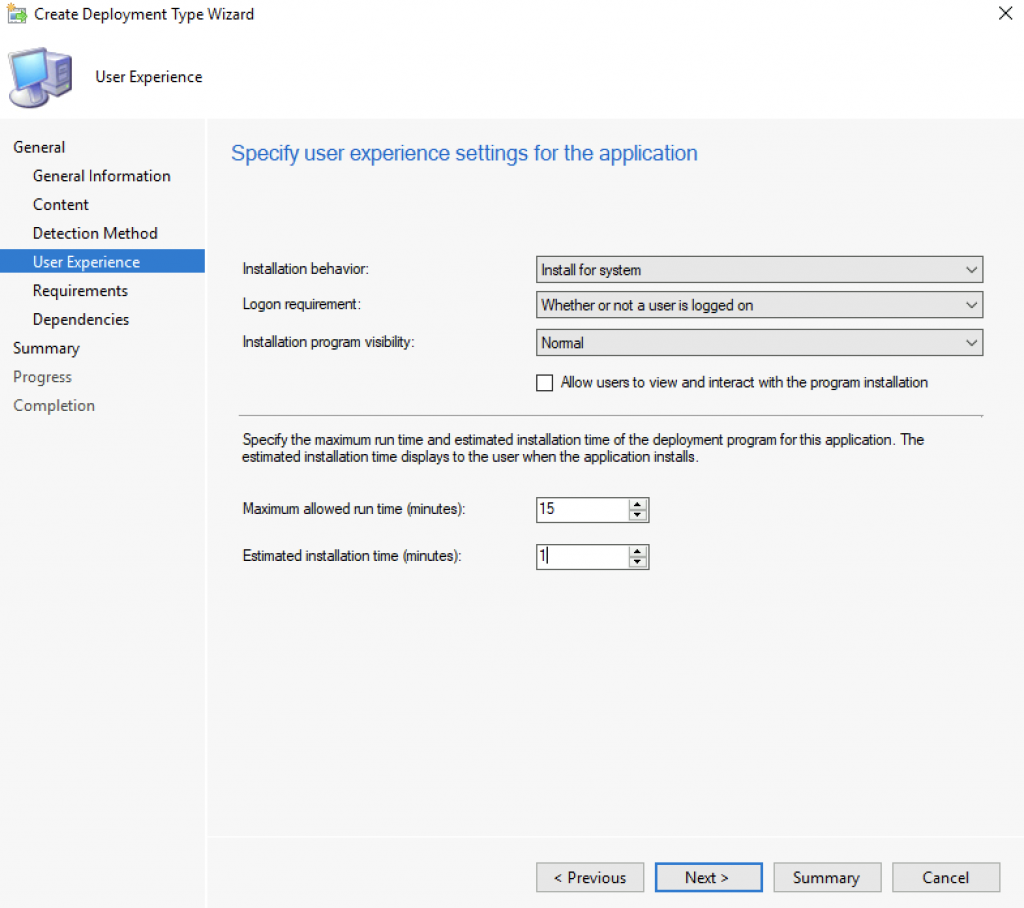
sentinelService.exeSelect Install for System and Whether or not a user is logged in. Select 15 minutes as the maximum time and 1 minute for the Estimated Installation time. Everything else can be left as default. The last two settings make no difference for a silent install, as it is information which would normally be displayed to users in Software Center. Click next and next again on the Requirements and Dependencies screens. You can tailor these if you like in your own environments. View the summary screen and ensure all is okay and next, then close.
After clicking on close, it takes you back to the Create Application Wizzard. We don’t need to do any more configuration, so continue to click next until the Application has been created and then click on close.
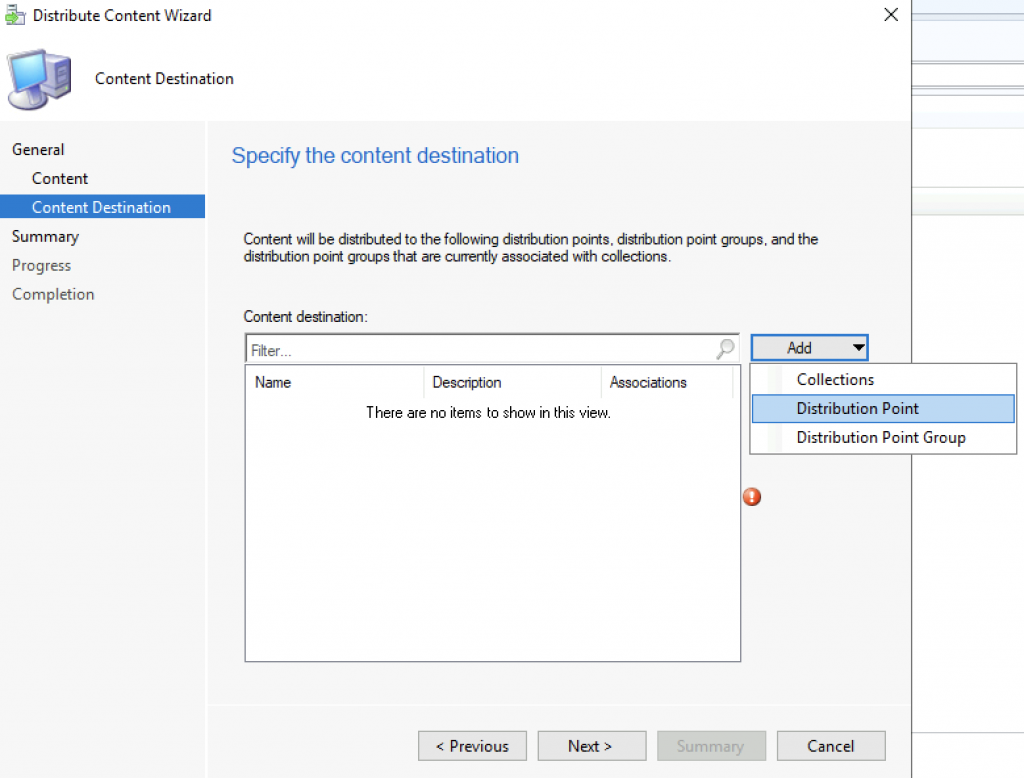
The next step is to distribute the Application to our Distribution Points. I have one in my lab, in a production environment there may be many. Right click on the Application and select Distribute Content. Within the Wizard on the first screen click next, then next again. On the Specify the content distribution, click Add > Distribution Point (this may be a Distribution Group in your environment).
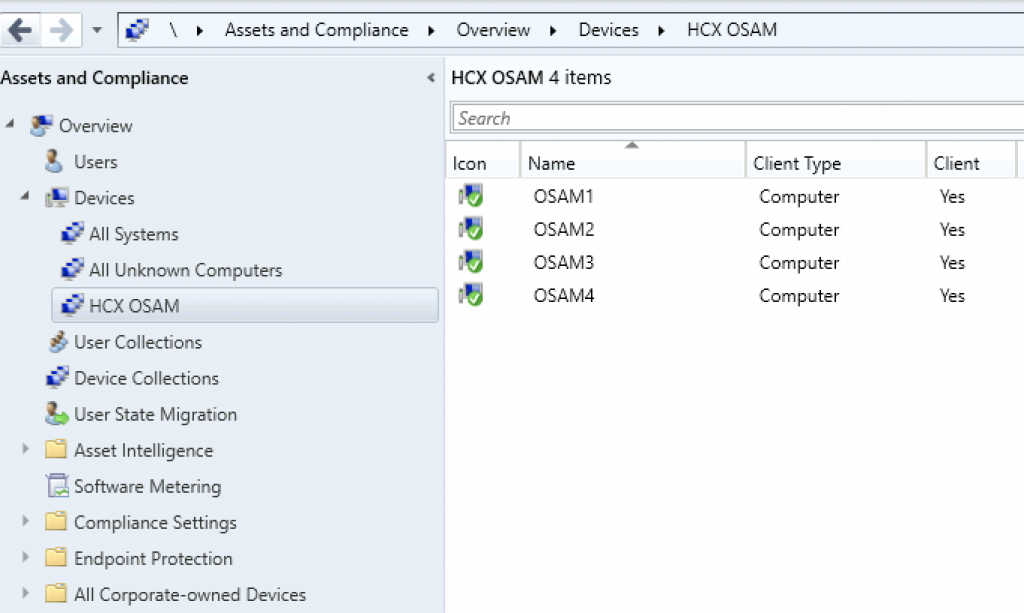
Once the Distribution Point(s) or Groups have been selected, click next twice and then close. Next we have to deploy the application to the VM guests. Here we can add the existing devices we want the Sentinel Agent installed on to a New Device Collection called HCX OSAM as an example, or add them to an existing collection. For lab purposes, I’ve added 4 Windows VMs to a HCX OSAM Device Collection.
Head back to Software Library and then Applications, right click on our newly created Sentinel Agent Application and click on deploy. To the right of the empty Collection box, click on browse and select the desired Device Collection where we want the Sentinel Agent to be installed on (you might have to change the scope to devices as it may default to users).
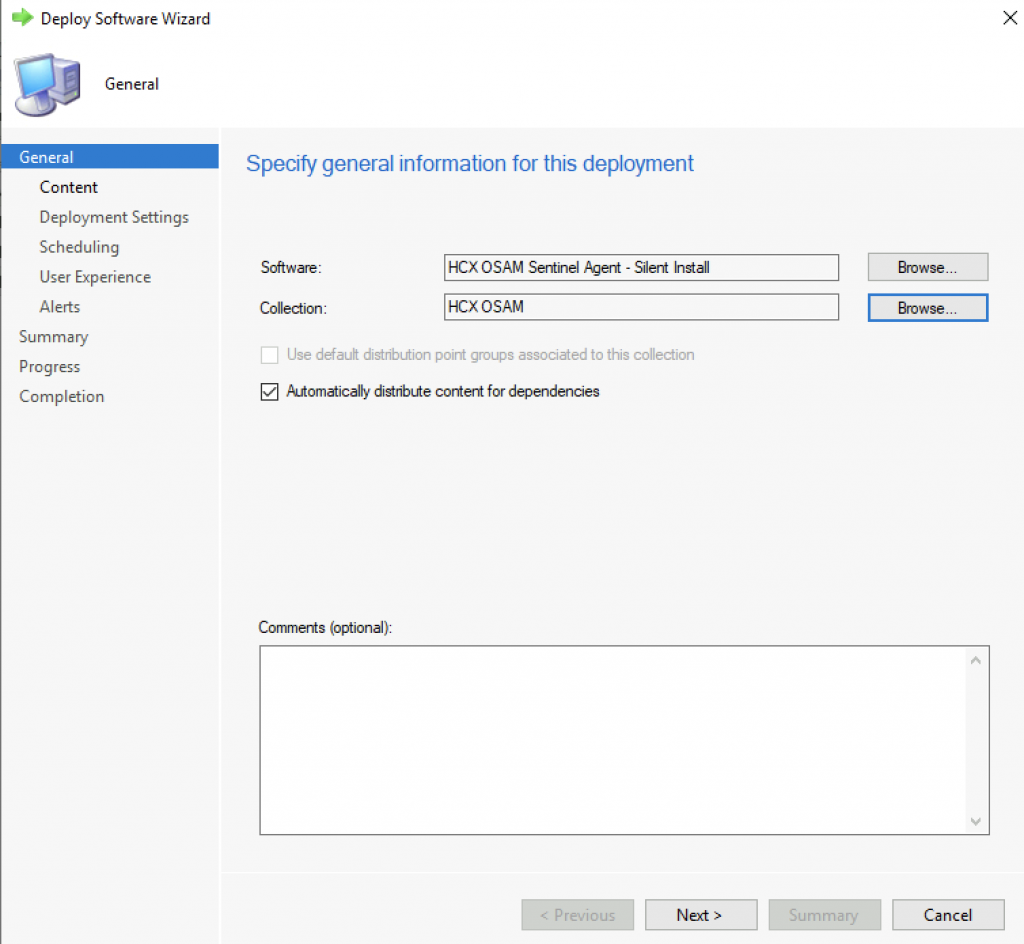
Click next and next again taking you to the Deployment Settings screen. Change the Purpose to required and click next twice. One the User Experience screen, we want to ensure that it is silent and no user intervention is required, do this by selecting Hide in Software Center and all notifications and click next twice then finish.
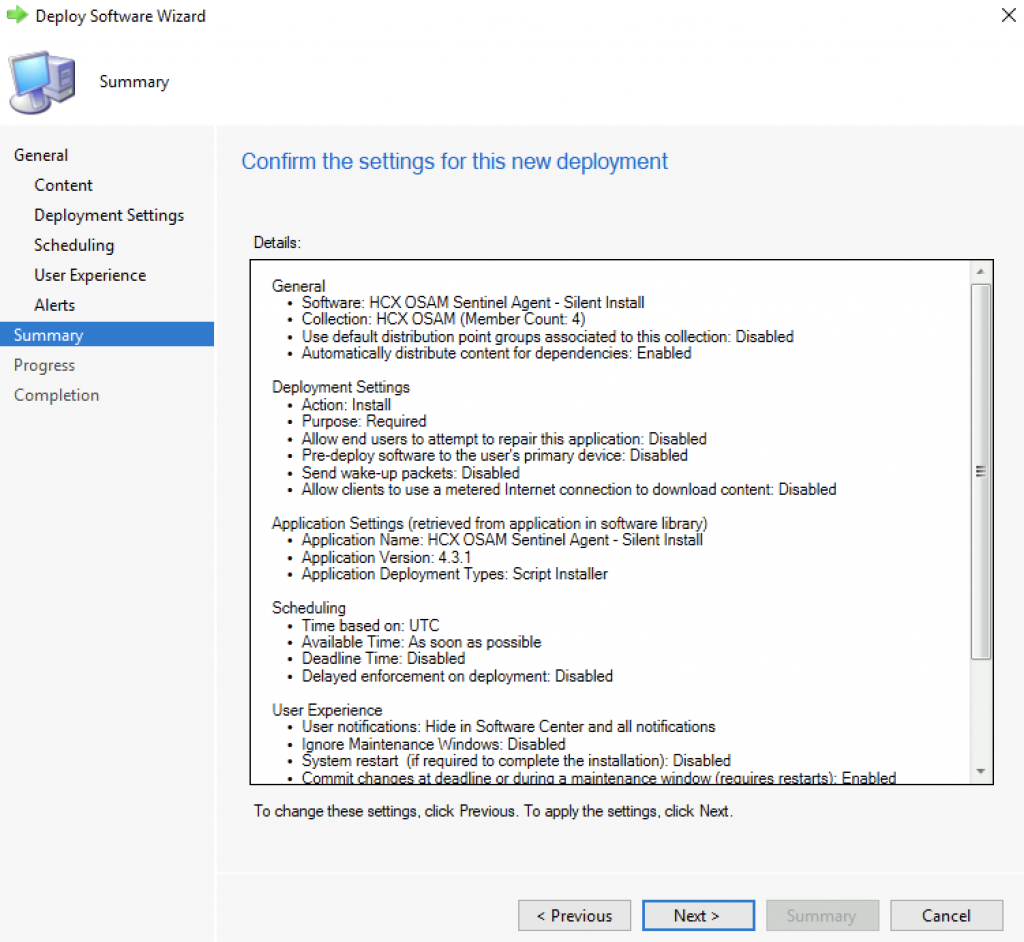
Review the Summary screen, click next and close. If all is healthy with your SCCM environment, the agent should install on the VMs defined in the Device Collection scope and they will appear until Sentinel Management within HCX. In my lab, VMs started to show up in Sentinel Management after a few minutes but it took around an hour for them all to appear. I don’t know if you can configure the amount of time, I presume this is an SCCM client setting which could be changed.
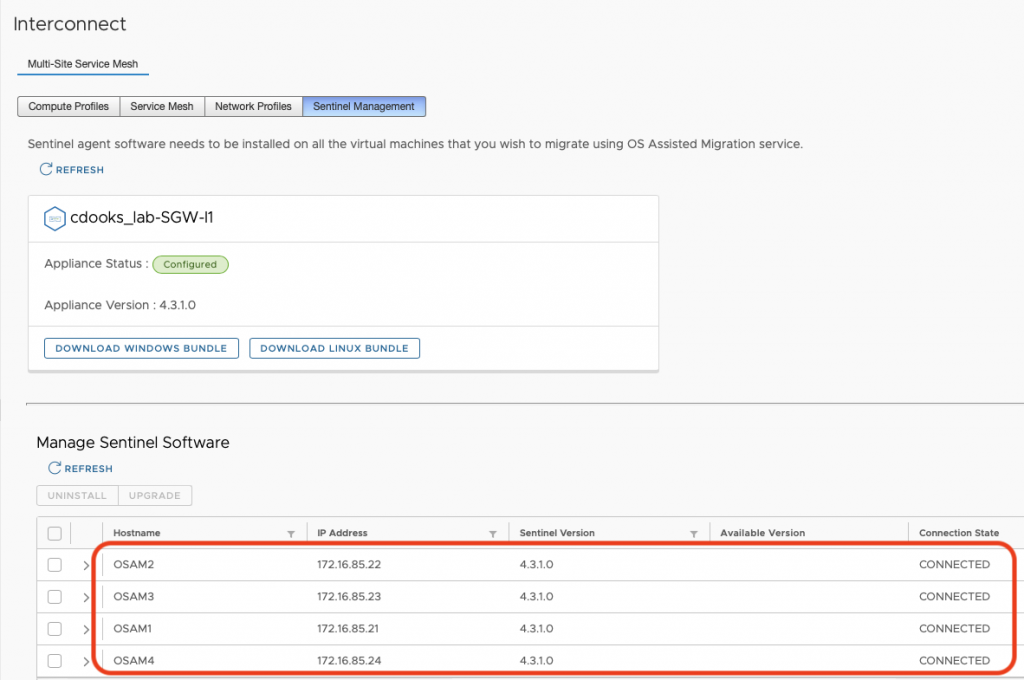
Now that the VMs are showing up within Sentinel Management in HCX, we can migrate them to the target environment and into vSphere.
The options I have gone with above are what work in my lab and of course you may wish to tailer them specifically for your environment. Seasoned SCCM administrators may baulk at the above, if you are one and the method described here can be done in a better way, please do let me know on Twitter or feel free to comment. Remember, I know very little about SCCM! I’m sure there are many other (and perhaps better methods) however this works fine.
As a final note, I initially encountered quite a few issues getting SCCM to work. I used a few different blogs and articles to get it functional. For anyone wanting to try the above, I found the ConfigMgr Prerequisites Tool, along with Prajwal Desai’s and Jay-R Barrios‘ blogs extremely useful.
This is excellent Chris, thanks for publishing this!
Thanks Gabe!