I’ve been working with a customer recently and they had an interesting question for me. They are migrating VMs from remote sites which have limited bandwidth. As such, HCX Bulk Migration is the method we have chosen for their migration project. During the day, they would like to limit the amount of bandwidth the migration is using so that their users and various services are not affected. Then in the evening when people log off, remove the limitation until the following morning.
Initially I investigated the use of limiting the bandwidth using the WAN Optimiser configuration. However, while it is possible to change it using Powershell, the new limit would only apply once the WO appliance was redeployed. This poses a problem, as the WO cache would be flushed during a redeployment; since it uses this cache to perform the data deduplication and optimisation it would have to be recalculated each time it is redeployed. I don’t have metrics, but after speaking to HCX product management, they said it wasn’t a great idea.
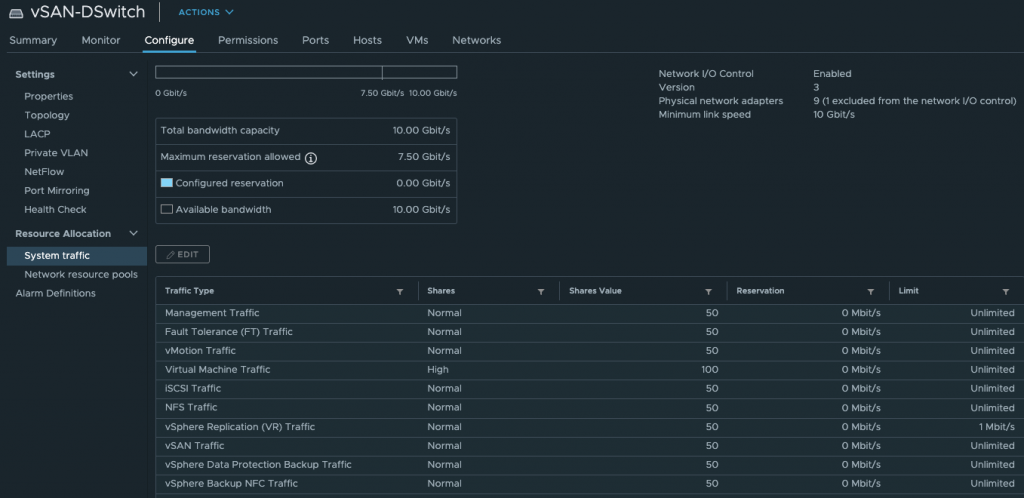
Although HCX doesn’t require the use of a distributed switch at the source site, this particular customer was using HCX Network Extension so had a vDS deployed. I then realised we could use NIOC to control vSphere Replication traffic as this is what HCX Bulk Migration uses to transfer data from ESXi hosts in the HCX Service Clusters to the IX appliance if they aren’t on the same host.
I then started a Bulk Migration and headed to the NIOC settings of my vDS and changed the limit to 1 Mbit/s.
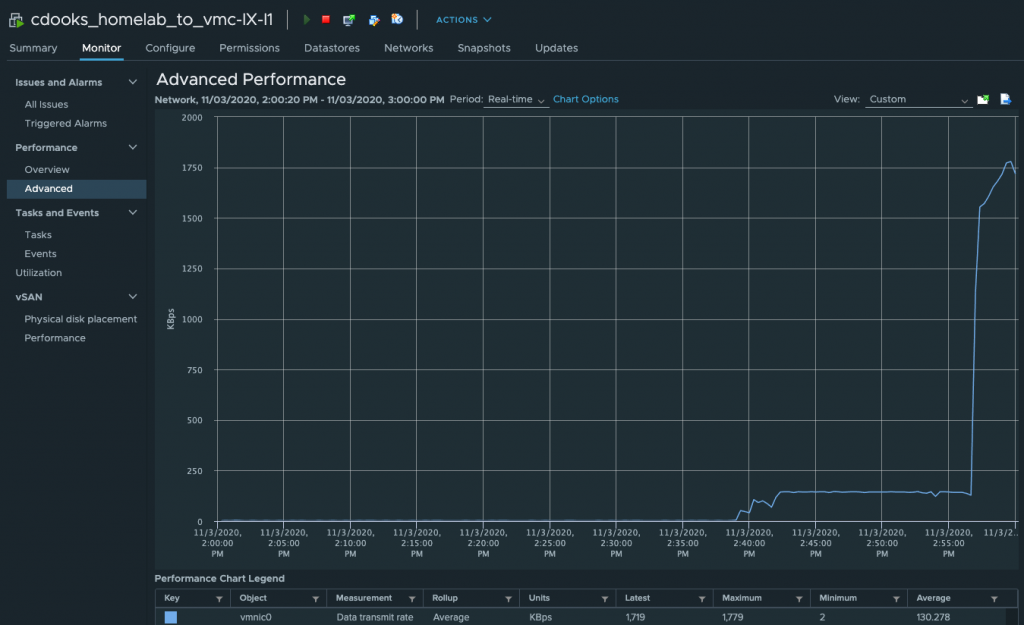
I then let replication run for around 20 minutes before removing the limit. Monitoring the vmnic of the Interconnect Appliance (IX) I could see the initial limit at 1 Mbit/s. Once the limit was removed, it changed to my internet upload limit (14 Mbit/s). Yeah, I know! Not the fastest but sadly that’s all I can get where I live.
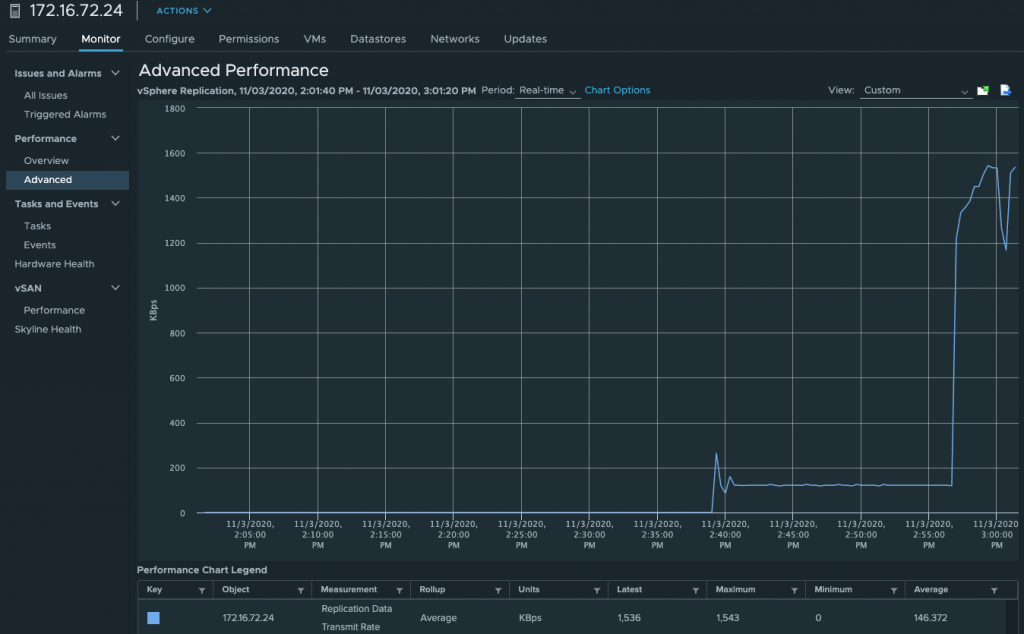
Looking at the ESXi host performance where the VM being migrated resides, we can see the behaviour is mirrored here under vSphere Replication Data Transmit rate.
Now that we know using NIOC works with Bulk Migration, all that is left is to automate the process using PowerCLI. I am not the greatest coder around so the below is a quick and dirty solution with no error handling. But, it works.
It’s important to remember that if the VM being migrated is on the same host as the IX appliance, NIOC won’t work as it is applied on the uplink. The workaround is to DRS rules to ensure that the VM isn’t on the same host as the IX.
# This script changes the vSphere Replication Limit on a vDS.
# The script will ask which vCenter server to connect to, the vDS name and the limit (in Mbit/s) to apply
#
$vcenter = Read-Host -Prompt 'Which vCenter server should this change be made against?'
$switchname = Read-Host -Prompt 'Input the VDS switch name'
$limit = Read-Host -Prompt 'What is the new required limit (in Mbit/s)'
Connect-VIServer -Server $vcenter
$dvs = Get-VirtualSwitch -Distributed -Name $switchname | Get-View
$cfg = New-Object -TypeName VMware.Vim.DVSConfigSpec
$cfg.InfrastructureTrafficResourceConfig = New-Object VMware.Vim.DvsHostInfrastructureTrafficResource[] (1)
$cfg.InfrastructureTrafficResourceConfig[0] = New-Object VMware.Vim.DvsHostInfrastructureTrafficResource
$cfg.InfrastructureTrafficResourceConfig[0].Key = 'hbr'
$cfg.InfrastructureTrafficResourceConfig[0].AllocationInfo = New-Object VMware.Vim.DvsHostInfrastructureTrafficResourceAllocation
$cfg.InfrastructureTrafficResourceConfig[0].AllocationInfo.Shares = New-Object VMware.Vim.SharesInfo
$cfg.InfrastructureTrafficResourceConfig[0].AllocationInfo.Shares.Shares = 50
$cfg.InfrastructureTrafficResourceConfig[0].AllocationInfo.Shares.Level = 'normal'
$cfg.InfrastructureTrafficResourceConfig[0].AllocationInfo.Limit = $limit
$cfg.InfrastructureTrafficResourceConfig[0].AllocationInfo.Reservation = 0
$cfg.configVersion = $dvs.config.configVersion
$dvs.ReconfigureDvs_Task( $cfg )
Write-Host "VDS $switchname vSphere Replication limit changed to $limit Mbit/s"
Thanks for reading.