This is the first part in a series of blog posts about VMware Cloud (VMC) on AWS, concentrating on how to set up a site to site VPN to VMC on AWS and then how to migrate on-prem workloads to it.
VMware Cloud (VMC) on AWS is a fully managed vSphere environment in collaboration with Amazon Web Services. Many customers are using VMC on AWS to migrate or extend their primary datacenter. This aim of this post is to walk you through how to securely connect your current vSphere environment with a VMC on AWS environment.
I’m going to assume that you already have your VMC on AWS account set up and that you have already deployed your Software Defined Data Center (SDDC).
Disclaimer: VMC on AWS is a chargable service, please do not go ahead and deploy this if you think it’s a free lab environment! Furthermore, this is not an official VMware guide, so use this at your own risk. Always consult with VMware and AWS about the best options available to you.
After the SDDC is deployed, the next step is to configure a secure way to access the new vCenter server. The easiest way is to open up the public facing firewall, but I would advise against this. A far better method is to create a site to site VPN. There are three options – Route Based, Policy Based or L2 VPN. In this blog post, I’m using my homelab and I’ve chosen to use the Policy Based VPN and set up a secure IPSEC tunnel between my home firewall and the NSX Edge which resides on the VMC instance.
Open up the SDDC instance from the VMC console and head to Networking & Security > VPN > Policy Based. You can see my existing VPN here.
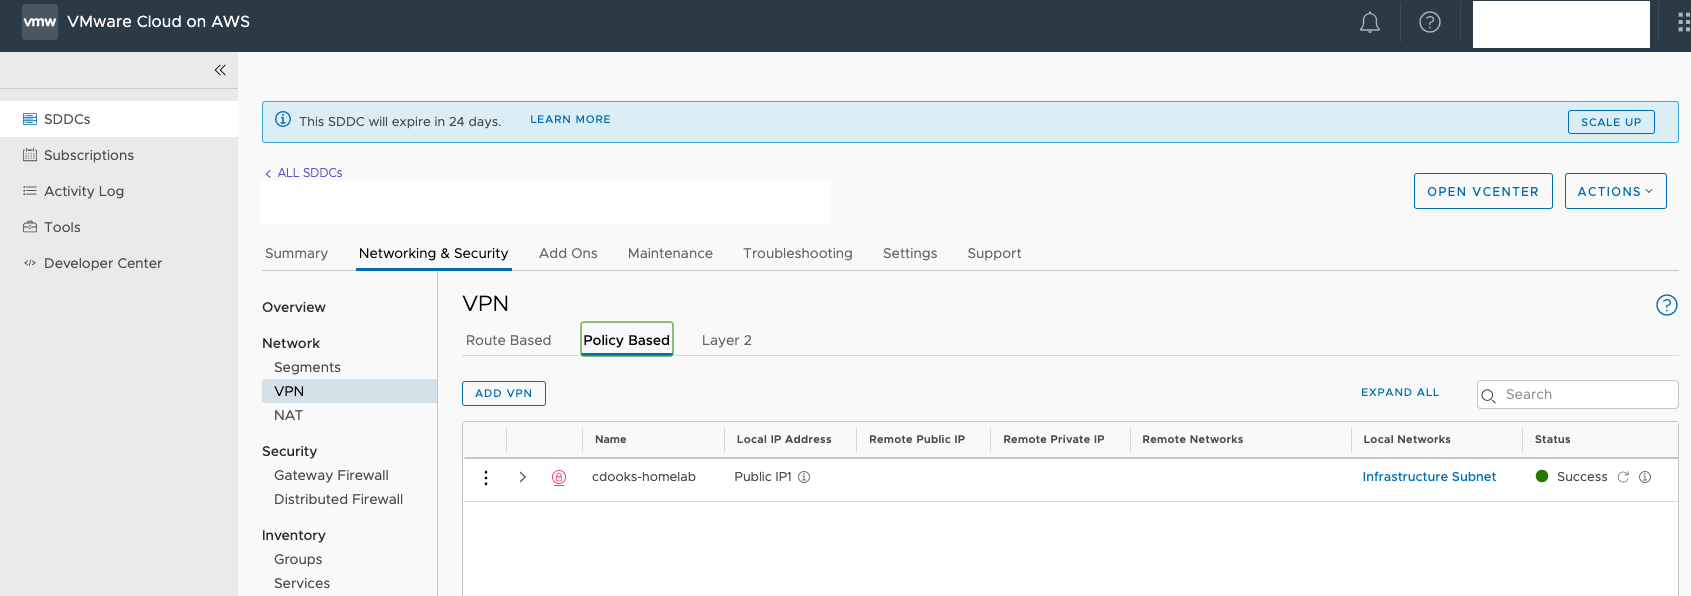
The VPN which I have set up already is shown above. Select ADD VPN and configure a new VPN.
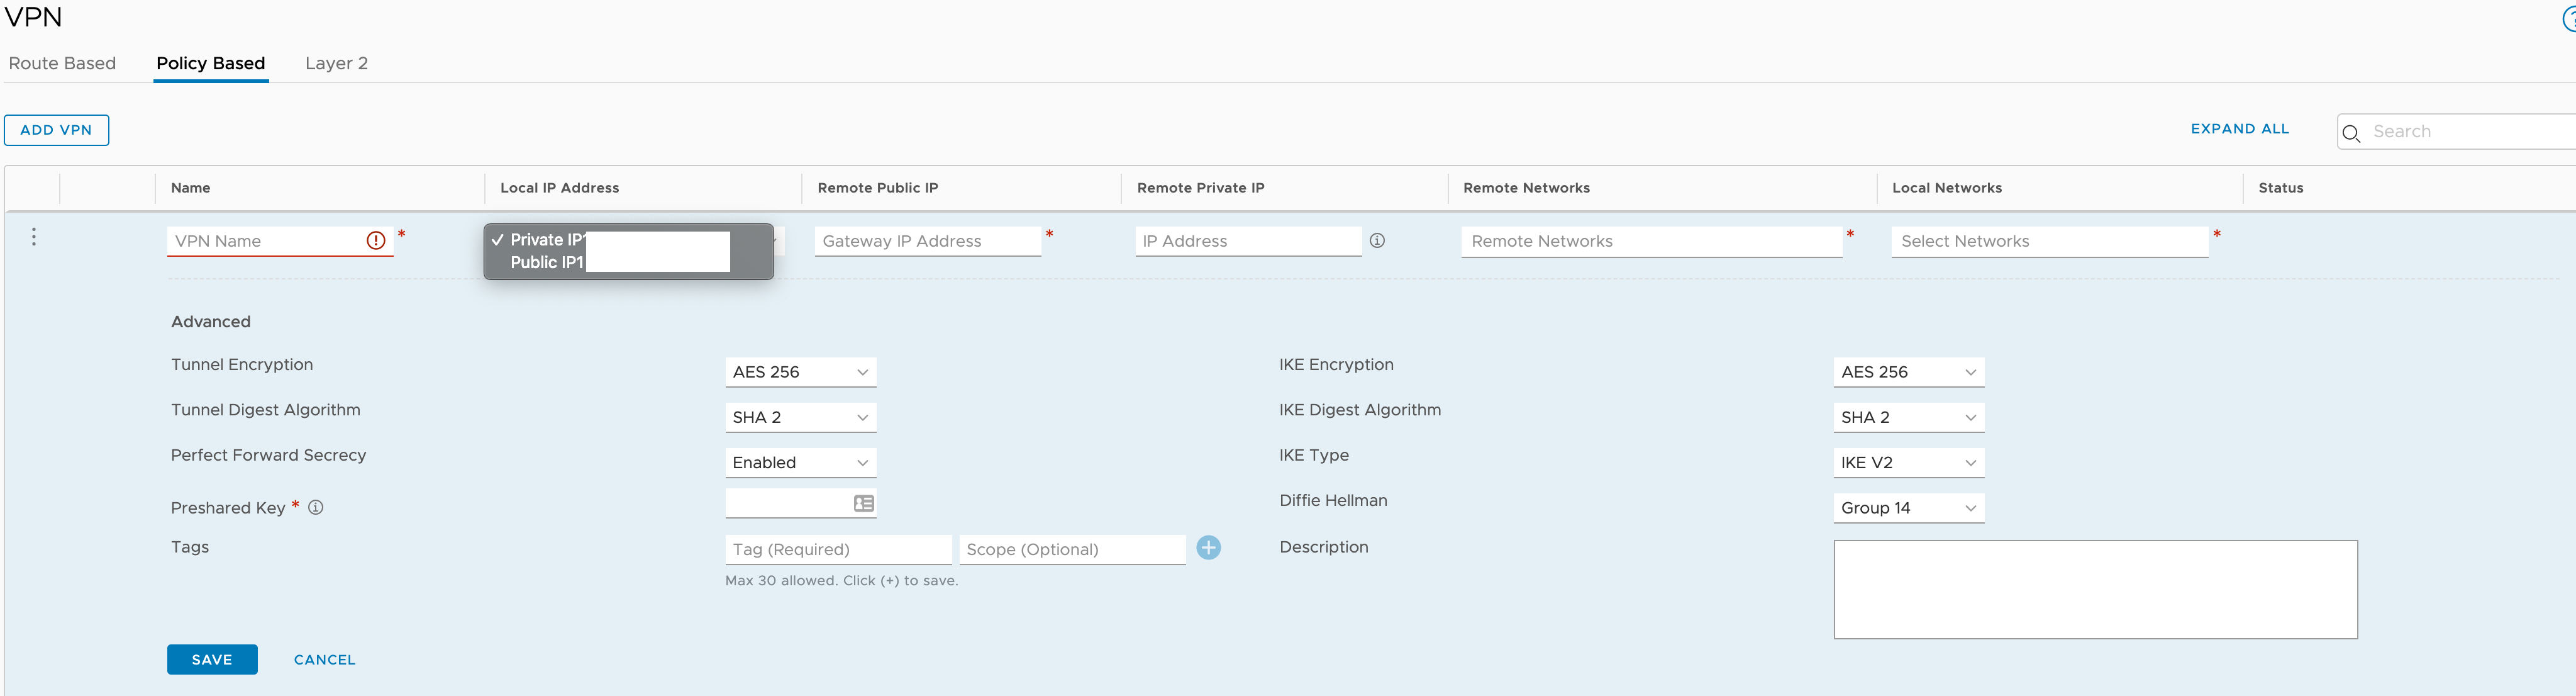
- Name – this can be called anything, make it something meaningful.
- Local IP Address – this is the local IP within the SDDC instance used to form the tunnel. Since we’re connecting over the internet, change this to public.
- Remote Public IP – this is the WAN IP of your current infrastructure. In my case it’s my home WAN IP address.
- Remote Private IP – this is used if your VPN device is sat behind a NAT device, ie an NSX Edge VM.
- Remote Networks – any remote networks which will be communicating with the SDDC instance will need to be entered here. If you have a lot, consider summarising your network, for example 192.168.0.0/20. Ensure that there is no overlap with the networks within the SDDC.
- Local Networks – you’ll need the main subnet in here which was created when the SDDC was deployed. It’s usually a /23 network. You’re also going to need any VMC on AWS workload networks you’re going to create once you know your IP schema.
- Under advanced we configure the phase 1 and 2 of the IPSEC tunnel. Consult your networking hardware/software documentation or network team on what it supports and how to configure this if required.
I run UniFi networking equipment at home which includes a UniFi Security Gateway (USG). I logged on to the controller, went to Settings, Networks and then Add New.
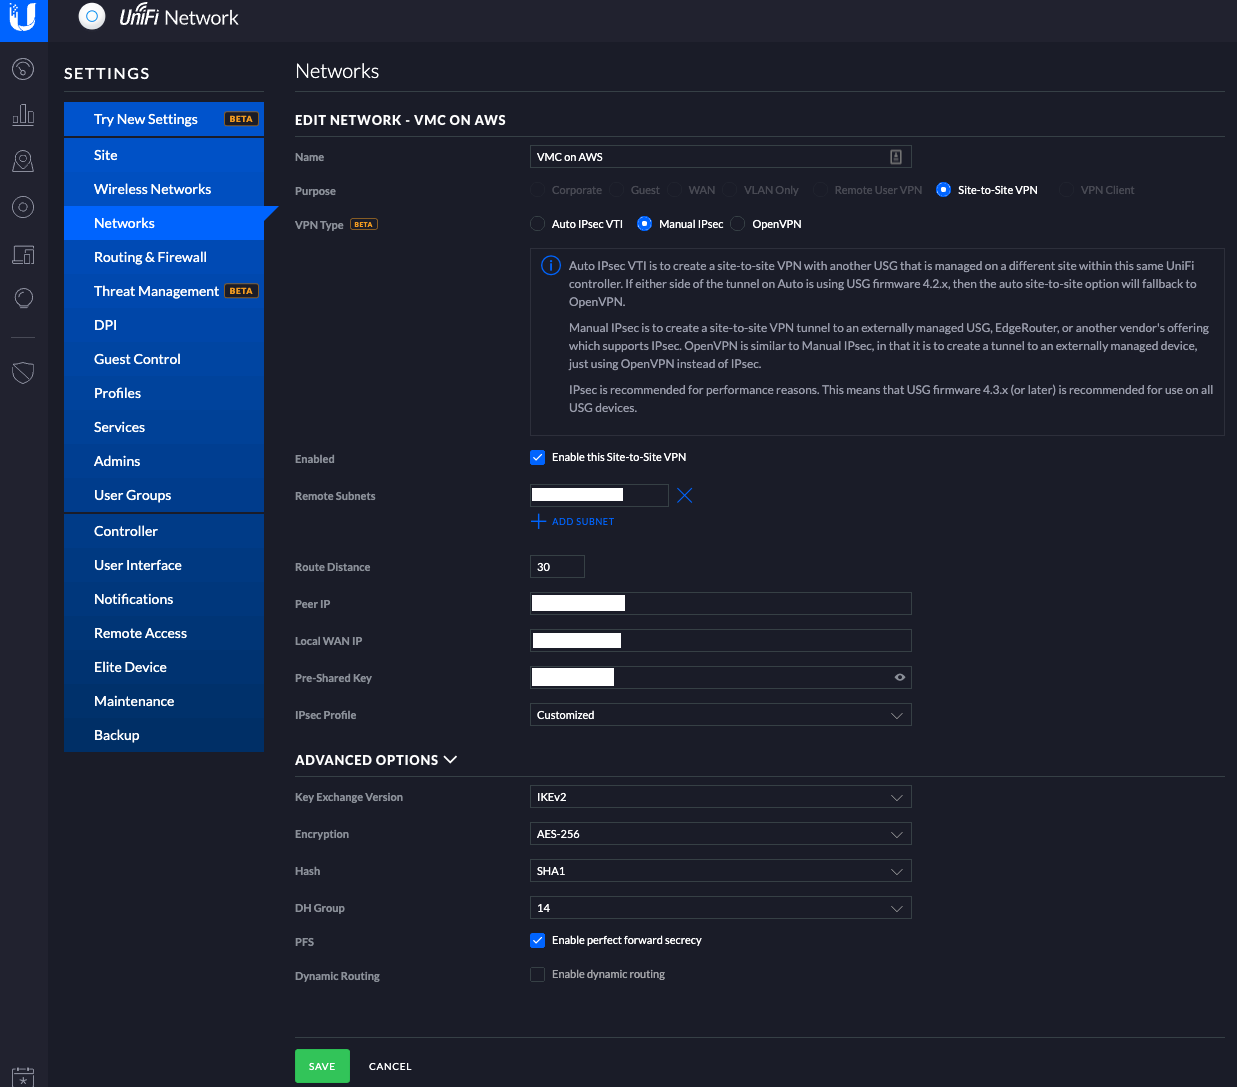
The settings here should reflect what has been set up at the VMC on AWS side. The USG doesn’t support SHA2 as an example so I had to drop to SHA1.
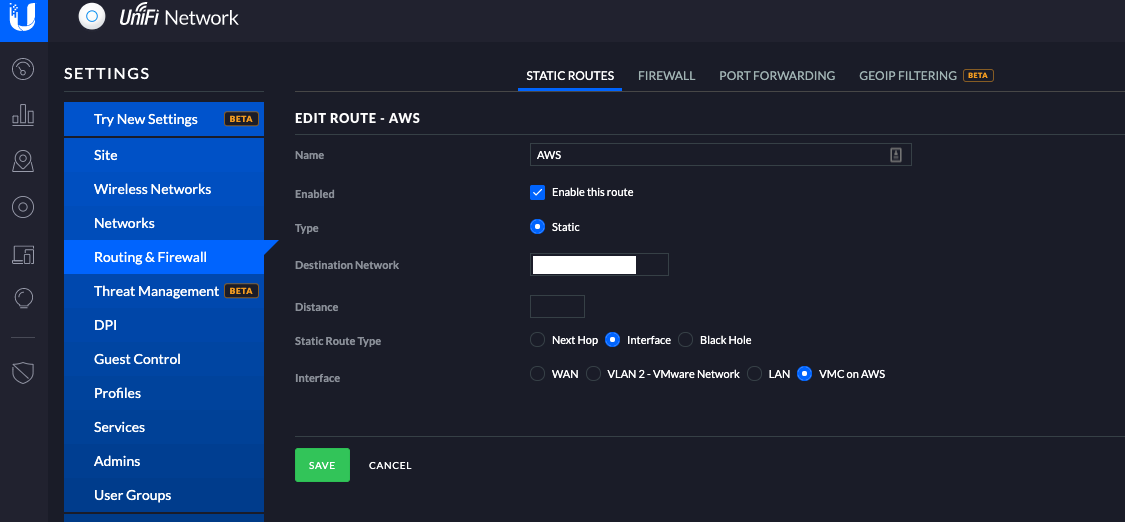
You also need to create a static route which forwards traffic destined to the SDDC management /23 network over the VPN otherwise there won’t be any route for the traffic to go. The VPN should drop in if everything is set correctly on both ends.
Once the VPN has been established, you need to create some firewall rules on the gateway firewall within the SDDC, otherwise all incoming traffic will be dropped – regardless if it’s over the VPN or not. Although in VMC on AWS we do not get direct access to NSX Manager, those familiar with NSX-T will recognise the interface under Networking & Security.
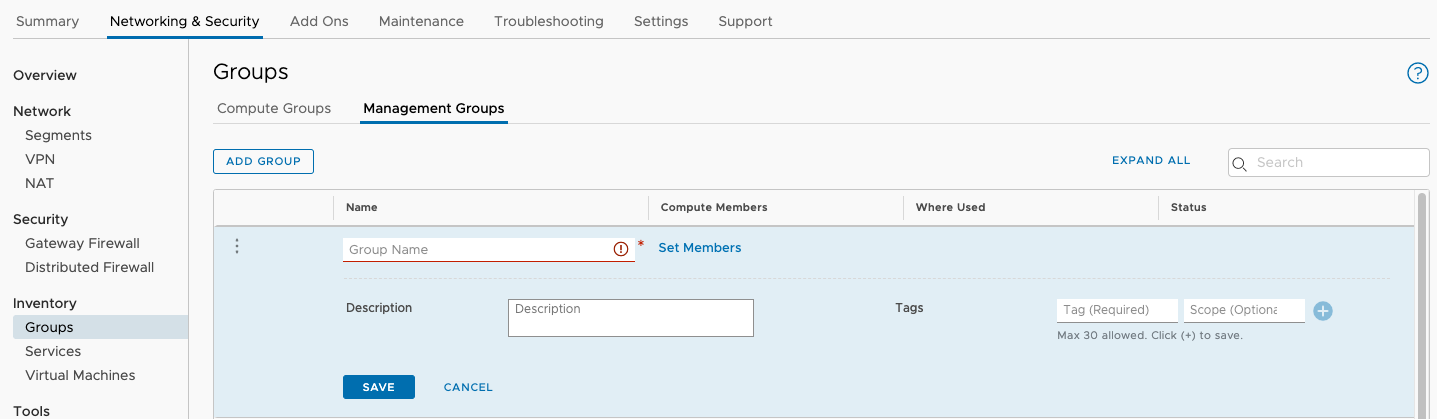
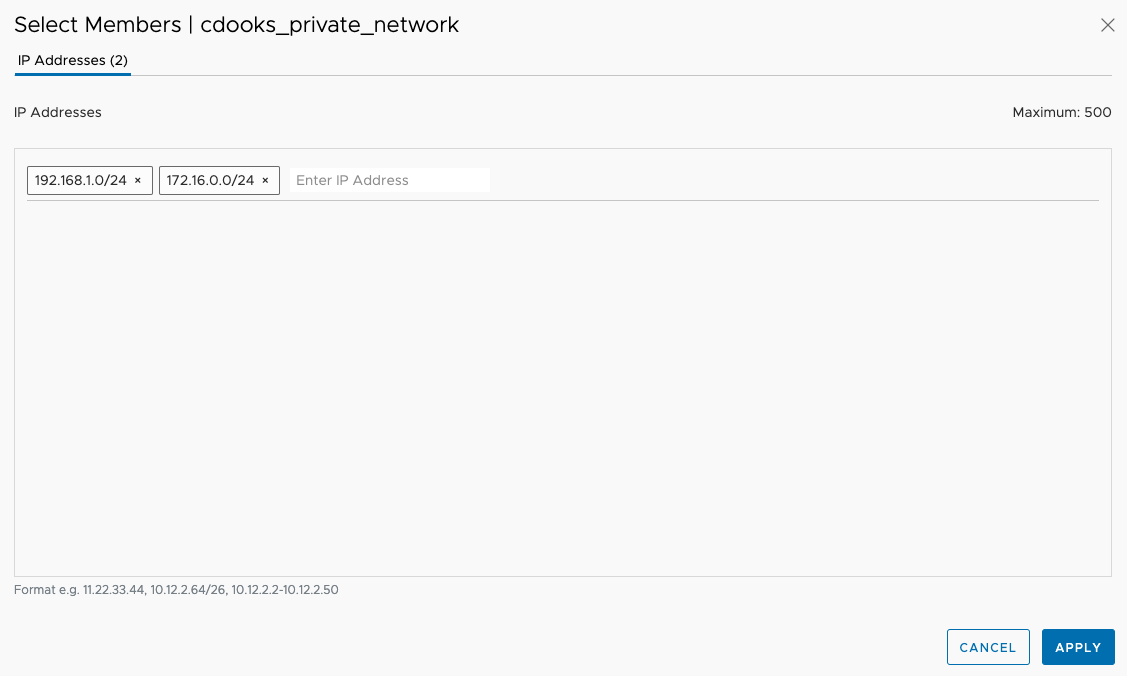
Head to Inventory > Groups > Management Groups. In here we need to define the on-prem networks as a group so that it can be applied to the firewall. Select Add Group and give it a name, such as *org_name*-private-network. Under Set Members is where we define the actual IP ranges.
In my case I’ve added two /24 networks which I use at home.
The subnets here would be your on-prem vCenter subnet as well as the subnet your administrators use. You can also add individual on-prem IP addresses if preferred for more granularity although this would increase complexity. Next head to Gateway Firewall under Security and then Management. Then Add Rule.

Give the rule a name and under Sources you want to select the group you just created under User Defined Groups. The destination should be vCenter and Services should incude:
- SSO – for Hybrid Linked Mode (if required)
- ICMP ALL – for troubleshooting
- HTTPS – for web access to the SDDC vCenter
Next publish the changes. As long as you are on an IP on your internal network which you have included in the firewall rule above, you should now be able to open vCenter. It should look something like this. I have previously set up HCX so there are HCX rules there, these can be ignored for now if you don’t have HCX deployed.

Now that we have access to the vCenter server and host(s) we need to deploy VMware HCX on-prem and on VMC. I will cover this in an upcoming blog post.